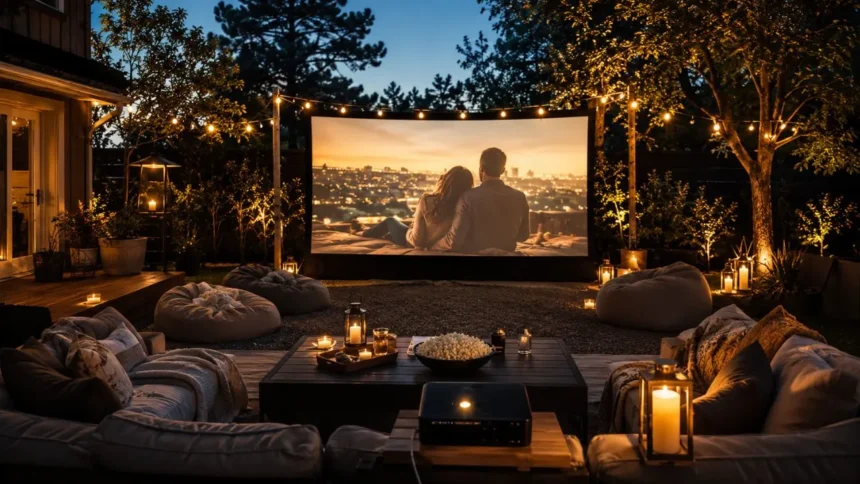
Bring the Big-Screen Experience to Your Backyard
Creating an outdoor movie theater is one of the most enjoyable ways to transform an ordinary backyard into a memorable entertainment space. Instead of watching another film indoors, you can enjoy a cinema-style experience under the night sky with family, friends, comfortable seating, and favorite snacks. A successful setup does not require a permanent structure or an enormous budget.
The basic idea is simple: you need a projector, a smooth viewing surface, a reliable audio system, a media source, and a safe power arrangement. However, the quality of your backyard movie night depends on how well these elements work together. A bright projector cannot compensate for a wrinkled screen, while an impressive picture can still feel disappointing when the dialogue is difficult to hear.
Modern outdoor cinema setups are also easier to assemble than older home theater systems. Portable projectors may include autofocus, automatic image correction, wireless connectivity, streaming features, and efficient LED or laser light sources. These conveniences reduce setup time, but thoughtful placement, weather preparation, and equipment testing are still essential for a smooth viewing experience.
This guide explains how to create an outdoor movie theater from the ground up, whether you are planning a casual family movie night or a polished backyard cinema for guests. You will learn how to select equipment, position the screen, improve sound, manage cables, prepare for weather, arrange seating, and avoid common outdoor movie setup mistakes.
Start by Choosing the Best Location
The right location can improve your outdoor movie theater before you purchase any equipment. Look for a flat area with enough distance between the projector, screen, and seating. A patio, lawn, deck, driveway, or open garden area can work well, provided viewers have an unobstructed line of sight and enough room to move safely after dark.
Pay close attention to nearby light sources when evaluating the space. Porch lights, streetlights, security lamps, windows, and neighboring properties can wash out the projected image. Position the screen so that direct light does not fall across its surface. Beginning the movie after sunset will produce a much clearer and more cinematic picture than attempting to project during daylight.
You should also consider wind direction, nearby trees, sprinkler systems, and ground conditions. Avoid placing the screen beneath loose branches or close to areas where moisture may collect. If the ground is uneven, chairs may wobble and guests seated behind others may struggle to see. A slight natural slope can be helpful because it improves viewing angles across multiple rows.
Finally, think about sound travel and your relationship with nearby neighbors. Point speakers toward the audience rather than toward property boundaries, and keep the screen close enough that you do not need excessive volume. Informing neighbors about the event and choosing a reasonable finishing time can prevent a fun backyard movie night from becoming an unnecessary disturbance.
Choose the Right Outdoor Movie Projector
The projector is the heart of an outdoor movie theater, so brightness should be one of your first considerations. Projectors designed only for dark bedrooms may appear faded on a large backyard screen. For evening use, a measured brightness of approximately 2,500 to 4,000 ANSI or ISO lumens offers a practical starting range, especially when some ambient light remains nearby.
Be cautious when comparing brightness claims because not every manufacturer reports lumens using the same testing method. Look for recognized ANSI or ISO lumen measurements rather than unusually large marketing numbers without a clear standard. Color brightness also matters because a projector may produce bright white images while delivering weaker, less vibrant colors during movies and animated content.
Resolution affects how detailed the picture appears, particularly on screens larger than 100 inches. A native 1080p projector provides a strong balance between cost and picture quality for most backyard theaters. A 4K projector can deliver additional detail, but the improvement may be less noticeable from longer seating distances or when the screen surface is not perfectly smooth.
Portable projectors are convenient because they may include built-in streaming, speakers, autofocus, keystone correction, and rechargeable batteries. However, convenience should not replace performance. Check the projector’s native resolution, measured brightness, input ports, throw ratio, audio output, and power requirements before buying. Built-in speakers are helpful for testing, but they are rarely powerful enough for a full outdoor audience.
Match the Projector to Your Screen Size
Screen size should be based on viewing distance, available space, projector brightness, and the number of guests. A screen measuring approximately 100 to 120 inches diagonally works well for many residential yards. It feels significantly larger than a television while remaining manageable for common portable projectors, inflatable screens, freestanding frames, and DIY outdoor movie screen designs.
Larger is not always better because increasing the image size spreads the projector’s light across a wider surface. A picture that appears bright at 90 inches may look noticeably dimmer at 150 inches. Before choosing the largest possible screen, test the projector at night and determine whether faces, dark scenes, subtitles, and colors remain clear from the planned seating area.
The projector’s throw ratio determines how far it must be positioned from the screen. You can estimate the required distance by multiplying the image width by the projector’s throw ratio. For example, a projector with a 1.2 throw ratio needs approximately 1.2 units of distance for every unit of image width. Always check the projector’s manual or built-in placement guide.
Short-throw projectors can create large images from relatively close distances, which is useful in compact yards. Standard-throw models may need to sit behind or among the audience, creating a risk of shadows and cable obstructions. Mark the projector location, screen position, and seating boundary before the event so you can confirm that everything fits comfortably and safely.
Select a Screen That Produces a Clear Picture
A dedicated outdoor projector screen normally provides the most reliable image because it offers a smooth, neutral-colored viewing surface. Freestanding frame screens are stable and produce a flat picture, while inflatable screens are quick to assemble and suitable for larger gatherings. Retractable screens can work well in covered patios where they are protected from moisture and strong wind.
A plain white wall may also serve as a projector screen when it is smooth, clean, and free from distracting features. Textured bricks, dark paint, windows, doors, and decorative trim can reduce image quality. Before relying on a wall, project a test image and check whether the surface creates visible shadows, color changes, distortion, or uneven focus.
For an affordable DIY movie screen, use a tightly stretched white blackout cloth, purpose-made projection fabric, or a smooth white sheet with minimal transparency. The material should be pulled evenly from every side to remove wrinkles. Dark fabric placed behind a thin screen can prevent light from passing through and improve perceived contrast during darker movie scenes.
Whatever screen you choose, secure it carefully. Wind can turn a loosely anchored screen into a sail, damaging equipment or injuring guests. Use weighted bases, strong frame connections, ground stakes where appropriate, and additional tie-down points. Do not leave an inflatable or fabric screen unattended, and take it down when wind conditions become unpredictable.
Build a Simple DIY Outdoor Movie Screen
A basic DIY outdoor movie screen can be created with projection fabric and a lightweight frame made from timber or PVC piping. Begin by measuring the desired screen dimensions and maintaining a widescreen shape close to a 16:9 aspect ratio. This format matches most modern movies, streaming programs, television content, and home theater projectors.
Construct the frame on a flat surface so the corners remain square and the screen does not lean. Reinforce larger frames with horizontal or vertical supports to prevent bending. If the screen will be used repeatedly, design the frame in sections that can be assembled, disassembled, and stored without placing permanent stress on the fabric or connecting joints.
Attach the screen material evenly, working from the center toward the corners. Clips, elastic loops, hook-and-loop strips, or evenly spaced fasteners can help maintain tension. Avoid pulling one side completely tight before securing the opposite side because this often creates diagonal wrinkles. The finished surface should appear smooth when illuminated by the projector.
Mount the screen high enough for guests in the back rows to see the lower portion of the picture. At the same time, avoid placing it so high that viewers must tilt their heads throughout the movie. Test the height from several seating positions and add secure supports, weighted feet, or ground anchors before connecting any electronic equipment.
Set Up Outdoor Sound Everyone Can Hear
Clear audio is just as important as a bright picture because viewers quickly lose interest when dialogue becomes difficult to understand. A pair of powered speakers positioned near the screen usually produces better results than the projector’s built-in speaker. Placing sound near the image also helps voices feel connected to the actors rather than coming from behind the audience.
For smaller gatherings, one high-quality portable speaker may provide enough volume. Larger seating areas benefit from two speakers placed on opposite sides of the screen and angled slightly toward the center. Keep speakers raised above ground level so grass, blankets, and people do not absorb the sound. Stable stands or protected tables can improve sound coverage.
Bluetooth speakers reduce cable clutter, but wireless audio can sometimes introduce a delay between the picture and sound. Test lip synchronization before guests arrive, particularly when using separate streaming devices and Bluetooth connections. A wired audio connection through an auxiliary cable, optical converter, HDMI audio extractor, or compatible receiver may provide more reliable synchronization.
Adjust the volume while standing at the front, middle, and back of the seating area. The goal is even coverage rather than maximum loudness. If guests at the front find the sound uncomfortable while those at the back cannot hear, reposition the speakers instead of simply increasing the volume. Directional placement helps preserve clarity while limiting noise beyond your yard.
Arrange Comfortable Seating with Clear Sightlines
Your seating arrangement determines whether the outdoor movie night feels relaxing or crowded. Place low seating near the front and taller chairs toward the back. Blankets, floor cushions, beanbags, inflatable loungers, and low camping chairs work well in the first rows, while standard garden chairs and folding seats provide better visibility farther from the screen.
Leave enough space between rows for guests to walk without stepping over bags, food, or other viewers. A central aisle or side pathway makes it easier to reach refreshments and restrooms after the lights are lowered. Marking pathways with dim solar lights or covered LED lanterns can improve safety without creating excessive ambient light around the projector screen.
Provide extra comfort with outdoor cushions, washable blankets, and small side tables. Evening temperatures often fall more quickly than guests expect, so keep additional throws available even during warmer seasons. Families with children may also appreciate a designated front area where younger viewers can move around without repeatedly blocking the screen for everyone else.
Test every seating position before the event begins. Sit in the front row to check neck angle, move to the back to confirm subtitle visibility, and stand in the aisles to identify trip hazards. A few minutes of testing can reveal blocked views, poorly positioned speakers, unstable chairs, or cables that need to be rerouted.
Create a Safe Outdoor Power Setup
Most home projectors, speakers, streaming devices, and decorative lights require a reliable power source. Use extension cords specifically rated for outdoor use and inspect them for cuts, exposed wiring, loose plugs, or damaged insulation. Avoid using lightweight indoor cords simply because they are available, especially when the equipment will remain outside for several hours.
Connect equipment to a ground-fault circuit interrupter, commonly called a GFCI, whenever outdoor electricity is involved. GFCI protection is particularly important in areas where moisture, damp grass, or unexpected spills may create an electrical hazard. Keep plug connections elevated, dry, and protected from foot traffic rather than leaving them directly on the ground.
Do not overload a single extension cord or power strip. Review the power requirements of the projector, audio equipment, media device, screen blower, lighting, and any food appliances. High-demand equipment should be separated when necessary, and cords should be fully uncoiled so heat does not build up inside a tightly wrapped cable reel.
Route cables along walls, fences, or low-traffic boundaries whenever possible. Where a cable must cross a walkway, use a proper cord cover rather than hiding it beneath a loose rug. Tape alone may lift from grass or dusty paving. Disconnect power immediately if rain begins, a connector becomes wet, or any equipment starts behaving unusually.
Control Lighting Without Washing Out the Image
Good backyard lighting should help guests move safely without reducing picture quality. Bright floodlights and uncovered porch lamps can make dark movie scenes appear gray and washed out. Turn off unnecessary lights near the screen, close illuminated curtains facing the yard, and direct essential pathway lighting downward rather than toward the viewing surface.
Warm, dim lighting usually creates a more comfortable cinema atmosphere than harsh white light. Low-output string lights, covered lanterns, rechargeable table lamps, and solar path markers can define seating and serving areas. Position decorative lights behind the audience or along the outer edge of the space so they do not shine directly into viewers’ eyes.
Create separate lighting zones for the screen area, seating area, refreshment station, and pathways. The screen zone should remain darkest, while the food table can use slightly brighter task lighting. This arrangement allows guests to refill drinks or find snacks without using phone flashlights that temporarily distract other viewers and reduce their night vision.
Test the projected image with every planned light switched on. A lamp that seems dim during setup may have a strong effect once the movie begins. Move, shade, lower, or switch off any light that creates glare. Smart plugs, remote-controlled lights, or dimmable fixtures can make adjustments easier after guests are seated.
Prepare a Reliable Movie Playback System
A streaming stick, laptop, media player, game console, tablet, or smart projector can serve as the movie source. Choose the option that offers the most stable connection and the simplest controls. Connect the device through HDMI when possible because a wired video connection generally reduces interruptions and avoids unnecessary wireless pairing problems.
Do not assume that your home Wi-Fi signal will remain strong at the far end of the yard. Test streaming performance at the exact projector location and check for buffering during high-quality playback. A mesh Wi-Fi point or suitable network extender may help, but downloading legally available content for offline viewing can provide a more dependable backup.
Confirm that the streaming service, device, and projector support the required resolution, audio format, and copy-protection standard. Some combinations may display menus correctly but show an error when protected video begins. Play several minutes of the actual movie during testing rather than relying on a home screen or short online clip.
Keep a second playback option ready in case the primary device loses its connection or requires an unexpected update. A downloaded movie on a compatible laptop or media device can prevent the evening from ending early. Charge remote controls, disable distracting notifications, switch off automatic sleep settings, and avoid scheduling major software updates before the event.
Protect the Setup from Weather, Wind, and Insects
Outdoor electronics should be treated as temporary equipment unless they are specifically designed and rated for permanent outdoor use. Most projectors are not weatherproof, even when marketed for backyard entertainment. Never expose the projector, speakers, streaming devices, power strips, or cable connections to rain, heavy dew, sprinklers, or uncovered condensation.
Check the hourly forecast rather than relying only on the daily weather symbol. Wind speed, humidity, temperature, and the chance of late-evening rain all affect an outdoor cinema setup. Establish a cancellation or relocation plan before guests arrive so you are not rushing to protect equipment while rain is already falling.
A covered patio or temporary canopy may offer limited protection, but it should not encourage you to operate electronics during unsafe conditions. Keep airflow around the projector because enclosed spaces can trap heat and block ventilation. Make sure any overhead structure is secure, does not obstruct the image, and cannot collect water above powered equipment.
Insects can also distract viewers and gather around bright screens or food. Remove standing water, keep rubbish covered, and position suitable insect-control devices away from the screen and dining area. Provide approved personal repellent when necessary. Fans can improve comfort and discourage flying insects, but they should be positioned so they do not shake the screen.
Turn the Movie Night into a Complete Experience
The most memorable backyard movie theaters feel welcoming before the film begins. Choose a simple theme based on the movie, season, or occasion, then carry it through the seating, menu, signs, and lighting. The goal is not to create an expensive event but to make the space feel intentionally prepared for your guests.
A self-serve snack station keeps refreshments organized and reduces movement during the movie. Popcorn, bottled drinks, sweets, fruit, and easy-to-hold snacks work better than messy meals in dark seating areas. Use covered containers to protect food from insects, label dietary options clearly, and place napkins and rubbish bins where guests can find them easily.
Add a short pre-show playlist, trivia game, family slideshow, or themed countdown before the feature begins. These details give late arrivals time to settle without interrupting the film. Keep the pre-show short, however, because younger viewers may become restless and the temperature may continue dropping as the evening progresses.
Consider the needs of every guest when planning the experience. Provide seats with back support, visible pathways, subtitle options, accessible routes, and a quiet area for anyone who needs a break. People-first planning turns a collection of equipment into a comfortable outdoor entertainment space that guests will genuinely enjoy.
Follow This Step-by-Step Outdoor Movie Setup
Begin by checking the forecast and clearing the viewing area during daylight. Assemble and anchor the screen, then mark the projector location according to the required throw distance. Arrange seats in low-to-high order and create safe walking routes before running cables. Daylight preparation makes it easier to identify uneven ground and unstable equipment.
Next, position the projector on a solid table, stand, or mounting platform. Connect the media source and display a test image. Adjust physical placement before relying heavily on digital keystone correction, because extreme correction can reduce usable image quality. Focus the picture carefully and confirm that all four corners remain sharp and properly aligned.
Connect the speakers and play a section containing both dialogue and music. Listen from several seating positions, check for wireless audio delay, and set a comfortable volume. Afterward, connect decorative lighting and turn off nearby lights one at a time to determine which fixtures can remain on without affecting the projected picture.
Finally, play at least ten minutes of the selected movie before guests arrive. Confirm video playback, subtitles, audio synchronization, internet stability, remote-control operation, and available battery levels. Place backup cables and essential controls in an easy-to-reach location. Once everything works, pause the film, prepare the refreshments, and welcome your audience.
Create an Outdoor Theater on Any Budget
A low-cost outdoor movie theater can begin with equipment you already own. A borrowed projector, smooth white wall, laptop, portable speaker, blankets, and outdoor-rated extension cord may be enough for a small family screening. Spending money only after testing the basic arrangement helps you identify which improvement will make the greatest difference.
For a mid-range setup, prioritize a brighter 1080p projector, a tensioned screen, dependable external speakers, and stable mounting equipment. These upgrades directly improve picture clarity, sound, and reliability. Decorative items can be added gradually, while good core equipment may support movie nights, gaming sessions, sports screenings, presentations, and other backyard entertainment.
A premium backyard cinema may include a high-brightness 4K projector, large framed screen, stereo or surround-style audio, weather-resistant cabinetry, permanent power outlets, and professionally planned lighting. Permanent electrical work and installed equipment should be handled by qualified professionals, particularly when local codes, buried wiring, structural mounting, or outdoor-rated enclosures are involved.
Before purchasing anything, decide how often the theater will be used and how much equipment you are willing to store. A compact portable setup may offer more value than a permanent installation for occasional movie nights. The best outdoor movie theater is not necessarily the most expensive one; it is the setup that is safe, easy to operate, and used regularly.
Avoid Common Backyard Movie Theater Mistakes
One of the most common mistakes is beginning the movie before the yard is dark enough. Even a powerful projector cannot compete effectively with direct sunlight. Schedule guest arrival before sunset, use the remaining daylight for snacks or activities, and begin the feature when the screen can produce satisfying contrast without forcing the projector to overcome excessive ambient light.
Another mistake is placing the projector where people repeatedly walk through the beam. This creates shadows, exposes the equipment to bumps, and increases the risk of someone tripping over cables. Use the projector’s throw ratio to plan its position, create a protected equipment zone, and keep controls accessible without placing the device in a busy aisle.
Poor audio planning can also spoil the experience. Relying on a small projector speaker, pairing an untested Bluetooth device, or placing one speaker behind the audience may result in weak dialogue and uneven sound. Test the complete audio chain before the event and choose speaker placement based on coverage rather than convenience.
Finally, do not ignore weather because the sky appears clear when setup begins. Dew, wind, sprinklers, and unexpected rain can damage electronics or create dangerous electrical conditions. Check the forecast, disable automatic watering systems, secure lightweight materials, keep protective containers nearby, and be prepared to disconnect and move equipment without delay.
Store and Maintain Your Outdoor Cinema Equipment
Allow equipment to cool before packing it away, especially projectors with active ventilation. Disconnect power by holding each plug rather than pulling the cable. Inspect the screen, cords, adapters, speakers, and mounting hardware as you dismantle the setup. Finding minor damage immediately gives you time to replace a component before the next event.
Make sure fabric screens are clean and completely dry before folding or rolling them. Moisture trapped during storage can create stains, odors, or mildew. Follow the manufacturer’s cleaning instructions and avoid harsh chemicals that may damage the reflective surface. Rolling suitable screen material loosely can reduce the deep creases caused by repeated tight folding.
Store the projector, streaming devices, remotes, and cables indoors in a dry, temperature-stable area. Use labeled containers so power adapters and connection cables remain with the correct equipment. Remove disposable batteries from devices that will not be used for a long period, and recharge battery-powered speakers or projectors according to their storage guidance.
Before the next movie night, inspect every outdoor-rated extension cord and test all electronics indoors. Clean projector vents, update streaming applications in advance, and confirm that accounts remain active. Routine maintenance takes little time, but it prevents avoidable delays and helps your backyard movie theater remain dependable throughout the season.
Make Every Outdoor Movie Night Worth Repeating
Learning how to create an outdoor movie theater is mainly about coordinating several simple elements. A suitable location, bright projector, smooth screen, clear sound system, comfortable seating, reliable playback source, controlled lighting, and safe power plan work together to create the experience. Weakness in one area can affect the entire event.
Begin with the equipment and space already available, then improve the setup based on real experience. After the first screening, ask guests whether the picture was bright enough, the dialogue was clear, and the seating felt comfortable. Their feedback can help you decide whether the next upgrade should be a better screen, stronger speakers, or more organized seating.
Keep the process practical rather than chasing a perfect commercial-cinema result. Outdoor movie nights are special because they feel relaxed, social, and different from watching television indoors. A slight breeze, shared popcorn, comfortable blankets, and a favorite film can be more memorable than technical perfection.
With thoughtful planning and a reliable routine, your backyard cinema can become a regular part of family evenings, birthday celebrations, neighborhood gatherings, and seasonal events. Set everything up before dark, test the full system, protect the equipment, and focus on your guests. Once the opening scene appears, it is time to sit back and enjoy the show.
Frequently Asked Questions
What do I need to create an outdoor movie theater?
You need a projector, screen or smooth wall, media source, external speaker, outdoor-rated power cord, and comfortable seating. Pathway lighting and weather protection also make the setup safer and more enjoyable.
How many lumens should an outdoor movie projector have?
A practical starting point is approximately 2,500 to 4,000 measured ANSI or ISO lumens for evening backyard use. Larger screens and brighter surroundings generally require greater projector brightness.
Can I use a regular projector outside?
Yes, a regular indoor projector can be used temporarily outside in dry, suitable conditions. It must be protected from rain, dew, dust, excessive heat, and moisture because most home projectors are not weatherproof.
What can I use instead of an outdoor projector screen?
A smooth white wall, tightly stretched blackout cloth, or wrinkle-free white projection fabric can work as an alternative. Avoid transparent, textured, reflective, or loosely hanging materials that may reduce image quality.
How far should guests sit from an outdoor movie screen?
A comfortable starting distance is roughly one-and-a-half to two-and-a-half times the screen’s diagonal size. Adjust the layout based on resolution, subtitle readability, viewing angle, and the preferences of your audience.