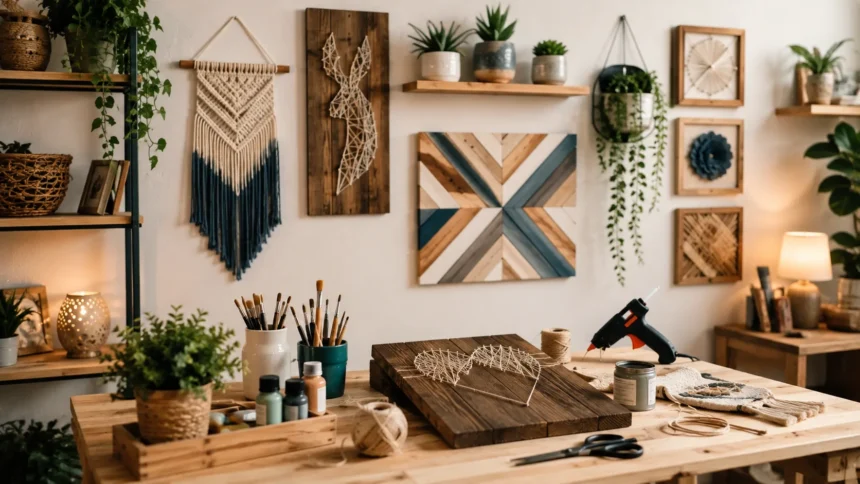
DIY Wall Decor Projects You Can Complete in a Weekend
Blank walls can make even a beautifully furnished home feel unfinished. The good news is that you do not need an expensive renovation or professional decorator to create a noticeable change. With a few basic materials, some creativity, and a free weekend, you can turn an overlooked wall into one of the most interesting features in your home.
DIY wall decor gives you more control over your home’s personality than buying everything ready-made. You can choose colors that match your furniture, use meaningful photographs, repurpose materials you already own, and create artwork sized specifically for your space. The result often feels more personal because you have contributed something of your own to the room.
Weekend DIY projects are also ideal for homeowners and renters who want a quick refresh without committing to major construction. Some ideas require little more than paint and painter’s tape, while others use affordable frames, fabric, wood, baskets, mirrors, or removable wall treatments. You can choose a project based on your experience, budget, and available time.
Below are practical DIY wall decor projects you can complete in a weekend, including simple wall art, gallery arrangements, textured features, shelving, painted designs, and renter-friendly options. Each idea is designed to add style and character without turning your weekend into a complicated renovation project.
Plan Your DIY Wall Decor Before You Start
Start by identifying which wall needs the most attention. A blank wall behind a sofa may need a large statement feature, while a narrow hallway might look better with smaller framed artwork. Choosing one specific area keeps your project manageable and prevents you from buying materials that do not suit the actual space.
Measure the width and height of the wall before deciding on artwork, shelving, mirrors, or other decorative elements. Wall decor that is too small can look disconnected from the furniture beneath it, while oversized pieces may overwhelm a compact room. Painter’s tape can help you visualize the dimensions before you install anything permanently.
Next, look at the colors and materials already present in the room. Your DIY wall decoration does not have to match everything exactly, but repeating one or two existing shades can make the finished project feel intentional. Wood tones, metal finishes, fabric textures, and frame colors can also help connect the wall with the rest of your interior.
Finally, prepare all the materials before the weekend begins. Gather paint, brushes, screws, wall anchors, picture hooks, measuring tape, a level, adhesive, and any decorative pieces you plan to use. Good preparation saves time and allows you to spend your weekend creating instead of repeatedly stopping to search for missing supplies.
Create a Painted Arch or Color-Block Feature
A painted arch is one of the easiest DIY wall decor ideas for creating a strong focal point with minimal materials. It works especially well behind a console table, desk, bed, reading chair, or floating shelf. The curved shape introduces visual interest without requiring you to paint an entire room.
Choose a paint color that complements the existing palette rather than selecting a shade simply because it is trendy. Muted greens, warm beige, terracotta, dusty blue, and soft neutral shades can add warmth while remaining easy to style. A more dramatic color can work well when the rest of the room is relatively simple.
Use a pencil, string, and level to sketch your arch before applying paint. Painter’s tape can help create clean vertical edges, while a small brush makes it easier to follow the curved section. Apply multiple thin coats rather than trying to achieve complete coverage with one heavy application.
Once dry, the painted feature can stand alone or become the background for other decor. Add a mirror, framed print, plant, wall-mounted light, or small shelf to create a layered composition. This combination makes a simple paint project feel more like a carefully designed feature wall.
Make Oversized Abstract Wall Art
Large wall art can be expensive, especially when you need a piece big enough to fill the space above a sofa or bed. Creating your own abstract canvas allows you to produce a custom-sized statement piece while controlling the colors, texture, and overall style.
Begin with a stretched canvas or lightweight wood panel and select three or four coordinated paint colors. You can use leftover interior paint if the colors already work within your room. Include at least one neutral shade so the artwork does not feel too visually heavy or disconnected from the surrounding decor.
Use broad brushes, sponges, palette knives, or simple pieces of cardboard to apply large areas of color. Rather than focusing on detailed painting skills, concentrate on balance, shapes, movement, and negative space. Abstract artwork often looks stronger when some areas remain simple instead of being completely filled.
Allow the piece to dry fully before hanging it. You can leave the canvas unframed for a contemporary appearance or build a basic wood frame around it for a more finished look. A large handmade piece instantly gives a blank wall more presence without requiring an expensive art purchase.
Build a Personalized Gallery Wall
A gallery wall is one of the most flexible ways to decorate because it allows you to combine artwork with meaningful personal items. Family photographs, travel pictures, postcards, illustrations, children’s drawings, typography prints, and small paintings can all become part of the same display.
Choose one element that connects the collection visually. You might use all black frames, similar wood finishes, matching mats, or a limited color palette. Alternatively, mixed frames can work beautifully if your decorating style is relaxed or eclectic, as long as the overall arrangement still feels balanced.
Lay everything on the floor before making holes in the wall. Move frames around until the spacing feels comfortable and the larger pieces anchor the smaller ones. Paper templates cut to the size of each frame can also be temporarily taped to the wall to test different arrangements.
Keep the gaps between pieces relatively consistent to create a polished appearance. The entire gallery should also relate to nearby furniture rather than floating randomly on the wall. Above a sofa or console table, for example, center the overall arrangement around the furniture rather than the dimensions of the entire room.
Turn Fabric Into Affordable Wall Art
Fabric is an inexpensive way to add pattern and softness to a wall, particularly when large framed artwork is outside your budget. You can use decorative fabric, vintage textiles, scarves, quilts, embroidered pieces, or even patterned curtain panels to create an interesting focal point.
One simple method is to stretch fabric over a blank canvas or lightweight wooden frame. Pull the material evenly across the surface and secure it at the back so the front remains smooth. This turns almost any attractive textile into lightweight wall art that can be easily moved later.
Another option is to hang fabric from a wooden dowel or slim decorative rod. This works especially well with woven textiles, block prints, and natural materials. The finished piece introduces softness and movement, which can help balance rooms containing lots of hard surfaces such as wood, stone, glass, or metal.
Fabric wall decor is also relatively easy to update. If your colors change or you want a different seasonal look, replace the textile without rebuilding the entire display. This flexibility makes fabric art especially useful for bedrooms, rental properties, home offices, and children’s rooms.
Install Simple Floating Shelves
Floating shelves combine wall decor and practical storage, making them useful in rooms where space is limited. They work above desks, beside televisions, in bathrooms, kitchens, entryways, bedrooms, and living rooms. Even a single shelf can make an empty wall feel more purposeful.
Choose shelving that complements the room’s existing finishes. Natural wood adds warmth, painted shelves can blend into the wall, and dark finishes create a stronger modern contrast. Before installation, confirm what type of wall you have so you can use appropriate screws, brackets, or anchors.
Once installed, decorate the shelves using objects with different heights and shapes. Combine small framed pictures, books, candles, ceramics, plants, and personal objects instead of filling the entire shelf with similar pieces. Layering taller items behind shorter ones creates a more natural and visually interesting arrangement.
Avoid overcrowding the shelves because empty space is part of good styling. A few well-chosen objects usually look more intentional than a long row of small decorations. You can also change the display throughout the year, making floating shelves one of the most adaptable wall decor ideas.
Create a Modern Wood Slat Accent
A wood slat feature adds architectural texture to an otherwise plain wall and can make a room feel more custom. You do not need to cover the entire surface to create an impact. A narrower section behind a television, desk, console, or bed can provide plenty of visual interest.
Light wood slats work well in Scandinavian, minimalist, and contemporary spaces, while darker wood can create a richer and more dramatic appearance. You can also paint the strips the same color as the wall for a subtle three-dimensional effect rather than emphasizing the natural grain.
Measure the wall carefully and decide on consistent spacing between each strip before installation. Use a level frequently because small alignment mistakes become more obvious as additional pieces are added. Depending on the material and wall surface, slats may be attached with nails, screws, or suitable construction adhesive.
If you want to keep the project beginner-friendly, use lightweight decorative molding instead of thick timber. This reduces cost and makes cutting easier. Once finished, consider placing a lamp or wall light nearby so shadows highlight the texture and make the wall appear even more dimensional.
Design a Wall With Decorative Baskets
Woven baskets can become beautiful wall decor because they introduce natural texture, shape, and warmth. They are particularly effective in bohemian, coastal, rustic, and relaxed contemporary interiors. Affordable baskets are often available from thrift stores, markets, and home decor shops.
Begin with one larger basket to establish the center of the arrangement. Then add smaller pieces around it, varying their size and texture while keeping enough visual connection between them. Natural materials such as rattan, bamboo, seagrass, and woven fiber usually coordinate well even when the patterns differ.
Arrange the baskets on the floor before transferring the composition to the wall. Try an organic cluster rather than a perfectly symmetrical layout if you want a relaxed appearance. Leave enough space between pieces so the individual shapes remain visible and the display does not appear overcrowded.
Basket walls work especially well above dining benches, console tables, beds, and sofas. Because many baskets are lightweight, installation is usually straightforward, but use secure hanging hardware appropriate for each piece. The finished result can fill a substantial wall without the cost of oversized artwork.
Create a Picture Ledge for Flexible Displays
A picture ledge is ideal if you enjoy changing your wall decor regularly. Unlike a traditional gallery wall, it allows frames to rest on a narrow shelf rather than requiring individual holes for every piece. You can rearrange the display whenever your tastes or photographs change.
Install one long picture ledge above a sofa, bed, desk, or hallway console. Alternatively, use two or three shorter ledges to create a layered arrangement. Measure carefully before mounting them so they remain level and visually connected with the furniture positioned underneath.
Place larger artwork toward the back and layer smaller framed pieces in front. Slight overlaps create depth and make the arrangement feel more relaxed than a perfectly aligned row. You can also add lightweight objects such as tiny plants, decorative letters, or small sculptural pieces.
Picture ledges are particularly useful for seasonal decorating. Artwork, photographs, postcards, and family pictures can be swapped throughout the year without repeatedly repairing nail holes. This makes the idea suitable for anyone who enjoys refreshing their home frequently without undertaking another full decorating project.
Make DIY Textured Canvas Art
Textured canvas art has become popular because it creates visual interest without requiring bold colors or detailed painting skills. Raised lines, arches, curves, and organic shapes produce shadows that change throughout the day as light moves across the surface.
Begin with a sturdy canvas or panel and apply an appropriate texture medium using a palette knife or broad tool. Keep your first design relatively simple. Wavy lines, overlapping arches, circles, and imperfect organic forms can look attractive without requiring complex artistic techniques.
Once the texture has completely dried, paint the entire piece in a single color or use closely related neutral shades. Warm white, beige, taupe, soft gray, and earthy tones are particularly effective because they allow the raised surface to become the main feature instead of competing with bright color.
Hang the piece where light can reach it from the side, as this helps emphasize its depth. Textured wall art works particularly well in minimalist bedrooms, calm living rooms, hallways, and modern dining spaces where subtle details can create interest without making the room feel busy.
Decorate With Pressed Botanical Art
Pressed plants offer a simple way to introduce nature-inspired wall decor without purchasing expensive botanical prints. Leaves, flowers, grasses, and small branches can become beautiful artwork once they are properly dried and displayed inside clean, simple frames.
Choose plants with recognizable shapes and relatively flat surfaces. Fern leaves, wildflowers, herbs, grasses, and delicate foliage can all work well. Place the plant material between absorbent sheets of paper and press it beneath several heavy books until it becomes completely flat and dry.
Arrange the dried plants against white, cream, kraft, or lightly textured paper. You can display one specimen per frame for a minimalist appearance or create several smaller compositions. Using identical frames makes the collection look more cohesive even when each botanical element is different.
Hang three pieces in a row or create a larger grid depending on the available space. Botanical wall art is especially attractive in kitchens, bedrooms, bathrooms, entryways, and interiors that already use wood, linen, stone, and other natural materials.
Use Mirrors as Decorative Wall Features
Mirrors can make wall decor more functional because they reflect both natural and artificial light. They can also make small rooms feel visually larger and brighter. Instead of relying on one traditional mirror, create a decorative arrangement using several smaller pieces.
Round mirrors create softer shapes, while square and rectangular mirrors feel more structured. You can keep all the frames consistent for a clean modern look or combine vintage-style designs for a collected appearance. The style should relate naturally to the surrounding furniture and finishes.
Think carefully about what each mirror will reflect before hanging it. A mirror facing a window, artwork, plant, or attractive light fixture can improve the overall room, while one reflecting clutter may have the opposite effect. Check different positions before installing anything permanently.
Mirrors are particularly useful in narrow entryways, dark hallways, compact dining rooms, and small bedrooms. Always use suitable mounting hardware for the weight of the mirror and your wall type, particularly when installing pieces above furniture or frequently used areas.
Paint a Simple Geometric Wall Mural
A geometric mural can transform a blank wall without requiring advanced artistic ability. Rectangles, triangles, arches, stripes, and overlapping color blocks are relatively easy to create with painter’s tape, yet they can give the room a highly customized appearance.
Select two or three colors that already relate to your existing furnishings. Limiting the palette helps prevent the design from becoming overwhelming. You might choose one neutral tone, one slightly deeper shade, and one accent color taken from a rug, cushion, or piece of artwork.
Sketch the basic arrangement before applying tape to the wall. Use a level for straight lines and press the edges of the tape firmly to reduce paint bleeding. Paint each section carefully and allow sufficient drying time where colors meet one another.
Geometric murals are particularly effective in home offices, children’s rooms, creative studios, entryways, and bedrooms. Because the design itself becomes the artwork, you may need very little additional decoration, helping you create a dramatic feature without filling the wall with multiple objects.
Create a Pegboard Display Wall
Pegboards are ideal when you want a wall that is both attractive and useful. Hooks, small shelves, containers, baskets, plants, photographs, and office supplies can all be arranged on the same surface. Best of all, the layout can be changed whenever your needs change.
Paint the pegboard to match your existing wall if you want it to blend into the room. For a more decorative effect, use a contrasting tone so the board itself becomes part of the design. Wooden pegboard systems can also add warmth and work particularly well in modern home offices.
Plan the arrangement around what you use most frequently. Place functional objects within easy reach while keeping decorative items higher on the wall. Balance practical storage with framed prints, plants, or attractive containers so the display feels intentional rather than purely utilitarian.
A pegboard is especially useful in craft rooms, kitchens, workspaces, children’s study areas, and entryways. Because the accessories can be rearranged without drilling new holes, it provides considerably more flexibility than permanently installed shelves or traditional wall organizers.
Make a Macramé or Yarn Wall Hanging
Macramé and yarn wall hangings can soften rooms that contain lots of straight lines and hard surfaces. They introduce texture without requiring large amounts of color, making them suitable for neutral bedrooms, reading areas, nurseries, and relaxed living spaces.
For a beginner project, start with a wooden dowel and cotton cord. Even simple knots repeated across several rows can create a decorative pattern. You do not need to master complicated weaving techniques to produce a handmade piece that looks thoughtful and visually appealing.
Another easy option is to tie lengths of yarn onto a wooden rod or piece of driftwood. Combine several closely related colors or use one neutral shade, then trim the ends into a curved, angled, or symmetrical shape. This creates a finished design with relatively little sewing or crafting experience.
Hang your textile piece above a bedside table, small sofa, bench, or console. Lightweight fiber art is particularly useful on narrow walls where a heavy framed picture may feel too formal. It can also add warmth to minimalist interiors without introducing unnecessary clutter.
Repurpose Old Frames Into New Wall Decor
Old frames are easy to find at thrift stores and can become valuable decorating materials even when the artwork inside them is outdated. Look beyond the existing finish and focus on the shape, size, and construction because paint can completely change their appearance.
Remove unwanted artwork and clean each frame carefully. Paint several frames in the same finish to create consistency or keep different wood tones for a more collected look. You can fill them with photographs, printable artwork, fabric, wallpaper remnants, sketches, or pressed flowers.
Frames do not always need traditional artwork inside them. An empty decorative frame can surround a small mirror, wall hook, sculptural object, or botanical arrangement. Combining unexpected elements can make inexpensive secondhand pieces feel much more distinctive and personal.
Creating wall decor from reused materials also makes it easier to experiment because the financial risk is lower. If you decide you do not like a particular arrangement, repaint or repurpose the frames again instead of feeling committed to an expensive purchase.
Try Removable Wall Decor for a Rental
Renters can still create attractive walls without making permanent modifications. Removable wallpaper, peel-and-stick decals, lightweight picture ledges, temporary hooks, fabric panels, and renter-friendly hanging systems provide several ways to personalize a space while limiting wall damage.
Peel-and-stick wallpaper can be particularly effective on a small accent wall, inside an alcove, or behind a desk. Choose a manageable area rather than covering several rooms at once. Smaller applications are easier to install and remove while still creating a strong decorative effect.
Removable hooks can support lightweight frames, garlands, baskets, and certain fabric pieces, provided you follow the weight limits and application instructions. Always make sure the wall surface is appropriate before using temporary adhesive products, as results can vary with different paint finishes.
The key is to focus on decorations you can take with you when you move. Art, textiles, lightweight mirrors, shelves designed for temporary installation, and framed prints allow you to make a rental feel personal without investing heavily in permanent improvements.
How to Make DIY Wall Decor Look More Professional
Start by getting the scale right. One of the most common decorating mistakes is placing a tiny piece of art on a very large wall. If your artwork feels too small, combine several pieces, use a wider arrangement, or choose one oversized project that visually connects with the furniture below.
Spacing also makes a noticeable difference. Gallery walls, baskets, mirrors, and framed displays look more intentional when the gaps between items are reasonably consistent. Use measuring tape, paper templates, and a level rather than relying only on your eye when positioning multiple objects.
Limit the number of unrelated colors and materials within one display. Repeating a few tones throughout the arrangement creates visual cohesion even when individual objects are different. For example, black frames, natural wood, and warm neutral artwork can connect several unrelated pieces.
Finally, do not feel obligated to fill every inch of the wall. Negative space helps individual elements stand out and keeps the room from feeling cluttered. Often the difference between a DIY display that looks homemade and one that feels carefully designed is knowing when to stop adding more.
Budget-Friendly Materials for Weekend Wall Projects
Affordable wall decor often begins with simple materials such as paint, unfinished wood, canvas, craft paper, fabric remnants, secondhand frames, rope, baskets, and printable artwork. Many of these supplies can be transformed dramatically without requiring expensive tools or advanced skills.
Check what you already have before shopping. Leftover paint can become abstract artwork, wallpaper scraps can be framed, unused fabric can become wall panels, and extra wood can turn into a picture ledge. Reusing materials keeps the budget lower and reduces unnecessary waste.
Thrift stores can also be excellent sources for mirrors, frames, baskets, plates, and artwork. Try to evaluate the underlying shape rather than the current color or finish. A dated frame or mirror can often look completely different after cleaning, painting, or combining it with newer decor.
Spend carefully on anything connected with installation and safety. Proper wall anchors, brackets, screws, and mounting hardware are more important than decorative extras when hanging heavier items. An inexpensive project should still be secure enough to remain safely attached to the wall.
Final Thoughts
You do not need a large decorating budget or weeks of free time to make your walls more interesting. A single painted feature, handmade canvas, gallery wall, shelf, mirror arrangement, or textile hanging can dramatically change how a room feels within one weekend.
Choose a project based on the wall you actually have rather than copying an idea simply because it looks attractive online. Consider your available space, furniture proportions, existing colors, budget, skill level, and how much maintenance or flexibility you want from the finished design.
Remember that DIY wall decor does not need to look perfectly manufactured. Small variations often give handmade pieces personality and make your home feel more individual. Focus on clean installation, thoughtful spacing, coordinated colors, and materials that genuinely suit your lifestyle.
Most importantly, start with one manageable project and finish it before moving to another. A carefully completed feature wall will usually have more impact than several half-finished decorating ideas, and it can give you confidence to tackle more creative home projects in the future.
Frequently Asked Questions
What is the easiest DIY wall decor project for beginners?
A painted arch, simple gallery wall, framed fabric piece, or abstract canvas is a great starting point. These projects require basic materials and can usually be completed without advanced DIY skills.
How can I decorate a large blank wall on a budget?
Try oversized homemade canvas art, a gallery wall, decorative baskets, fabric panels, floating shelves, or a painted mural. Using larger-scale elements prevents the wall from looking empty without requiring expensive artwork.
What can I use for wall decor besides pictures?
Mirrors, woven baskets, decorative plates, shelves, wood slats, textiles, macramé, plants, pegboards, and handmade textured panels can all create visual interest without relying on traditional framed pictures.
How do I make DIY wall decor look expensive?
Use a limited color palette, choose decor that suits the scale of the wall, maintain consistent spacing, and install everything carefully. Simple designs usually look more polished when they are not overcrowded.
Can DIY wall decor really be completed in one weekend?
Yes. Painted accent features, gallery walls, abstract artwork, picture ledges, basket arrangements, and many other simple wall projects can be completed over a weekend when you prepare your supplies in advance.