How to Clean Shower Tiles and Remove Tough Grime the Easy Way
Shower tiles can look fresh and polished when they are clean, but soap scum, hard water deposits, body oils, mildew, and mineral buildup can quickly dull their appearance. The challenge is that different types of grime respond to different cleaning methods, so using one product for every problem does not always give the best result. Ceramic, porcelain, natural stone, and textured shower tiles can also react differently to cleaners, which makes surface-safe cleaning important. A good routine focuses on loosening buildup, using the right cleaner, scrubbing without scratching, and preventing grime from returning too quickly. With a practical step-by-step approach, even neglected shower walls can usually be improved significantly. The key is cleaning smarter rather than scrubbing harder for long periods.
Why Shower Tiles Get Dirty So Quickly
Shower tiles are constantly exposed to water, soap, shampoo, conditioner, body oils, and minerals from tap water. Every shower leaves behind a thin layer of residue, even when the walls appear clean immediately afterward. Over time, those invisible layers combine and become cloudy soap scum or sticky grime. Areas with hard water develop additional mineral deposits that can look white, chalky, or crusty. Warm moisture also creates conditions where mildew can develop on grout and caulk. Because all of these problems can occur at the same time, shower tile buildup often becomes more difficult to remove when regular cleaning is delayed.
Soap scum forms when ingredients in soap react with minerals in water and cling to bathroom surfaces. It often appears as a cloudy film on glossy tile, glass, fixtures, and grout. Body wash can sometimes leave less traditional soap scum than bar soap, but conditioners, oils, and other personal-care products still contribute residue. This buildup can trap dirt and make tiles feel rough or greasy rather than smooth. Once several layers accumulate, ordinary rinsing is no longer enough to remove them. A cleaner that breaks down oily residue and mineral deposits becomes much more effective than simply wiping the surface with water.
Hard water is another major contributor to dirty shower tiles. Water containing higher levels of dissolved calcium and magnesium can leave mineral deposits behind after droplets evaporate. These deposits gradually build into cloudy spots, white streaks, or stubborn scale around grout lines and fixtures. The problem is especially noticeable on darker tiles because pale mineral residue contrasts strongly with the surface. Hard water stains can also become more difficult to remove when they are repeatedly exposed to heat and allowed to accumulate for months. Regular drying and periodic descaling can significantly reduce how severe the deposits become.
Grout tends to look dirty faster than tile because it is often more porous and textured. Soap residue, dirt, and moisture can settle into small surface irregularities where a normal wipe may not reach. Light-colored grout can gradually turn gray or yellow, making the entire shower look less clean even when the tiles themselves are in good condition. Mildew can also develop where moisture remains trapped for long periods. Corners, lower wall sections, and areas near bottles or shower accessories are especially vulnerable. Cleaning grout separately from tile often produces a much more noticeable overall improvement.
Ventilation also affects how quickly a shower becomes dirty. A bathroom that remains humid for hours after bathing provides more time for moisture-related problems to develop. Poor airflow can slow drying on grout, caulk, corners, and textured tile surfaces. Exhaust fans, open doors, or other forms of ventilation can help moisture leave the room more quickly. Even a perfectly cleaned shower will become dirty again faster when it stays wet constantly. That is why long-term shower maintenance depends on both cleaning and moisture control.
What You Need to Clean Shower Tiles Properly
A basic shower tile cleaning kit does not need to be complicated. A non-scratch sponge, microfiber cloth, soft-bristle brush, old toothbrush, spray bottle, bucket, and squeegee are enough for many routine cleaning jobs. The brush helps reach grout lines and textured areas where a flat cloth cannot provide enough agitation. Microfiber cloths are useful for wiping residue and drying tiles without leaving much lint behind. A squeegee helps remove water after cleaning and can also be used daily to reduce future buildup. Having the right tools makes the process faster and reduces the temptation to use aggressive scrubbing methods that may damage surfaces.
The safest cleaner depends on the tile material. Ceramic and porcelain tiles generally tolerate a wide range of household cleaners, although abrasive products can still scratch glossy finishes. Natural stone such as marble, travertine, limestone, or certain types of slate requires more caution because acidic cleaners can etch or discolor the surface. When the tile type is unknown, start with a mild pH-neutral cleaner designed for bathroom surfaces. Always check the product label and test a small hidden area before treating the entire shower. Surface compatibility matters just as much as cleaning power.
Dish soap can be useful for removing oily residue and general grime because it is designed to break down grease. A small amount diluted in warm water can work well on many sealed ceramic and porcelain surfaces. Baking soda can add gentle scrubbing power for stubborn spots, but it should still be used carefully on delicate finishes. White vinegar is commonly used against mineral deposits and soap scum, yet it should not be used on acid-sensitive natural stone. Hydrogen peroxide-based bathroom products are sometimes useful for stains and mildew on compatible surfaces. Matching the cleaner to the problem prevents unnecessary damage.
Avoid assuming that stronger chemicals automatically produce better results. Mixing cleaning products can create dangerous fumes or chemical reactions, especially when bleach-based products are combined with acids or ammonia. Use one cleaning product at a time and follow the label instructions carefully. Good ventilation is important whenever stronger bathroom cleaners are used. Gloves can also protect the skin from prolonged contact with cleaning solutions. Safe cleaning habits are especially important in small shower enclosures where fumes can become concentrated quickly.
Before cleaning, remove shampoo bottles, soap dishes, razors, baskets, and other items from the shower. These objects block access and often hide some of the dirtiest areas. Rinse containers before returning them because sticky product residue can transfer directly back onto clean tiles. Move removable shelves or caddies if possible so the wall behind them can be washed properly. Clearing the shower also helps you identify stains, grout discoloration, and mineral deposits more easily. A completely open surface is much easier to clean thoroughly than one covered with bathroom accessories.
How to Clean Shower Tiles Step by Step
Start by rinsing the shower walls with warm water. This simple step removes loose hair, dust, and surface residue while helping soften soap buildup. Warm water can also make dried grime easier for the cleaning solution to penetrate. If possible, run the shower briefly or use a handheld sprayer to wet the entire tiled area. Avoid using extremely hot water on surfaces that may be sensitive to sudden temperature changes. Once the walls are evenly damp, you can apply the appropriate cleaner more effectively.
Apply your chosen cleaner from the lower sections upward or according to the product directions. Working in manageable sections prevents the solution from drying before you have time to scrub it. Let the cleaner sit for several minutes if the label allows because dwell time helps loosen buildup. This is often more effective than immediately scrubbing with excessive force. Heavily soiled areas around corners, shelves, and lower grout lines may need a second application. Keeping the cleaner in contact with the grime long enough can dramatically reduce the amount of effort required.
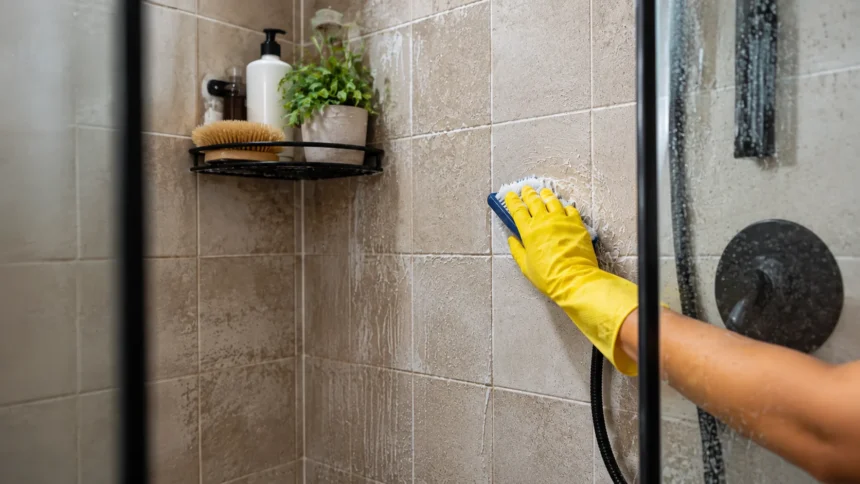
Use a non-scratch sponge or soft brush to scrub the tile surface. Work in small circular motions and pay extra attention to areas that feel rough or look cloudy. Textured tile may need more brushing because residue can settle into the surface pattern. Avoid steel wool or highly abrasive pads because they can scratch glazed finishes and create permanent dull patches. If a stubborn area does not improve, reapply cleaner and allow additional dwell time rather than immediately switching to harsher tools. Controlled repetition is safer than aggressive scrubbing.
Rinse the walls thoroughly with clean water after scrubbing. Any cleaner left behind can dry into streaks, attract additional residue, or irritate skin during the next shower. Use a handheld showerhead, bucket, or damp microfiber cloth to remove all traces of the product. Check corners and grout lines carefully because foam often remains trapped in these areas. If the tile still feels slippery after rinsing, continue removing residue. A properly rinsed surface should feel clean rather than coated.
Finish by drying the tiles with a microfiber cloth or squeegee. Drying is more important than many people realize because it reduces water spots and mineral buildup. Start at the top and work downward so water is pushed toward the shower floor. Wipe corners and horizontal ledges where droplets collect. This final step gives the tiles a cleaner appearance immediately and also helps slow the return of hard water stains. Making drying part of the normal shower routine can significantly reduce how often deep cleaning is needed.
How to Remove Tough Soap Scum
Soap scum usually requires a cleaner that can break down both oily residue and mineral buildup. On ceramic or porcelain tile, a bathroom cleaner specifically labeled for soap scum is often the simplest option. Spray the affected surface and allow the product to work for the recommended time before scrubbing. Thick buildup may need more than one treatment because removing years of residue in a single pass can be difficult. Focus on gradual improvement rather than using excessive pressure. Repeated safe treatments are usually more effective than one extremely aggressive cleaning session.
For lighter buildup on compatible surfaces, diluted dish soap can help loosen oily residue. Apply the solution with a sponge and work it into cloudy areas using gentle circular motions. Warm water can help soften the film before cleaning. Rinse thoroughly because dish soap itself can leave residue if too much is used. If the surface remains dull after rinsing and drying, mineral deposits may be contributing to the problem rather than soap residue alone. Identifying the type of buildup helps determine the next cleaning step.
Vinegar-based solutions are commonly used on ceramic and porcelain tile for mineral-rich soap scum. The mild acidity can help dissolve deposits that alkaline cleaners may not remove effectively. However, vinegar should not be used on marble, limestone, travertine, or other acid-sensitive natural stone. Even repeated mild exposure can permanently dull or etch these surfaces. If you are unsure whether your shower contains natural stone, use a pH-neutral stone-safe product instead. A cleaner that works well on one shower can damage another depending on the tile material.
Baking soda can provide mild abrasive action when soap scum feels thick or sticky. A small amount mixed with water can form a paste that is gently worked over resistant areas on compatible surfaces. Do not scrub aggressively because even mild abrasives can affect certain finishes. Rinse completely afterward so no powdery residue remains in grout lines or texture. Baking soda is most useful as a supplemental cleaning method rather than a universal solution. Surface testing is always a sensible precaution before treating a large area.
Once the soap scum has been removed, consider changing a few daily habits to prevent it from rebuilding. Rinse shower walls briefly after bathing to remove leftover product residue. A squeegee or microfiber cloth can then remove much of the remaining water. Keep shampoo and conditioner bottles on a shelf or caddy that allows the wall behind them to dry. Regular light cleaning is far easier than removing thick accumulated soap scum. Prevention can turn a difficult monthly job into a quick weekly maintenance task.
How to Remove Hard Water Stains From Shower Tile
Hard water stains are mineral deposits left behind when water evaporates. They often appear as white spots, cloudy film, or crusty residue along grout lines and around fixtures. On ceramic and porcelain surfaces, acidic descaling products can be effective because they help dissolve calcium-based deposits. Always follow the cleaner’s directions and provide good ventilation. Do not allow strong descalers to remain on grout or metal fixtures longer than recommended. Careful application gives you cleaning power without unnecessary surface damage.
White vinegar may help remove mild hard water stains from acid-safe tile. Apply it to the affected area and allow short contact time before wiping or gently scrubbing. Never use vinegar on marble, travertine, limestone, or other calcite-based stone because the acid can damage the finish. If natural stone is present, choose a cleaner specifically labeled for that material. This distinction is extremely important because mineral deposits and etched stone can look similar once damage occurs. Testing a hidden spot prevents costly mistakes.
For thicker mineral buildup, repeated treatments may be necessary. Apply the appropriate cleaner, wait for the recommended dwell time, scrub gently, rinse, and then inspect the surface after drying. Mineral deposits are often easier to judge once the tile is completely dry because wet surfaces can temporarily hide cloudy areas. Avoid scraping deposits with metal blades unless the surface manufacturer specifically allows it. Hard tools can scratch glazed tile or damage grout. Chemical loosening combined with gentle mechanical cleaning is usually safer.
Hard water buildup often appears worst around faucets, showerheads, and lower walls where droplets remain after use. These areas benefit from regular drying because evaporation is what leaves the minerals behind. A daily squeegee takes only a short time and can dramatically reduce spotting on smooth surfaces. Wiping fixtures with a microfiber cloth also prevents thick crust from forming around edges. If your household has extremely hard water, routine maintenance becomes even more valuable. Frequent light cleaning prevents minerals from bonding into stubborn layers.
In homes with persistent hard water, a water-softening or conditioning solution may reduce future mineral buildup depending on local water conditions and household needs. However, changing the water system is not necessary for everyone. Simple drying, weekly cleaning, and prompt removal of deposits can keep tiles looking good without major plumbing changes. The goal is to stop mineral layers from accumulating month after month. Once the underlying pattern is controlled, shower cleaning becomes significantly easier. Prevention usually saves more time than repeated heavy descaling.
How to Clean Shower Grout
Grout often requires more focused cleaning than the surrounding tile because its textured surface traps dirt and moisture. Start with a mild grout-safe cleaner and a narrow nylon brush. Apply the cleaner directly to the grout lines and allow it to sit briefly if the product instructions recommend dwell time. Scrub along the lines rather than randomly across the whole wall. This concentrates effort where discoloration is most visible. Rinse thoroughly afterward to remove loosened dirt and cleaning residue.
Baking soda paste is commonly used for dirty grout on compatible surfaces. Mix baking soda with a small amount of water until it forms a spreadable paste, then apply it to stained grout. Allow it to remain for a short period before gently brushing. This method can help lift surface dirt without using extremely harsh chemicals. However, nearby natural stone may still require caution because different cleaning ingredients can affect the tile even when they are intended for grout. Always consider the complete shower surface before choosing a cleaner.
Hydrogen peroxide-based products can sometimes help with stained grout and mildew on compatible installations. Use them according to label directions and avoid mixing them with other cleaners. More is not always better, and repeated chemical exposure can eventually affect grout appearance or surrounding materials. If grout remains dark after cleaning, the discoloration may be deeper than surface dirt. Old grout can absorb staining over many years. At that point, professional cleaning, recoloring, or repair may provide a better result than endless scrubbing.
Avoid using overly stiff metal brushes on grout because they can damage the surface and weaken joints. A medium or soft nylon grout brush usually provides enough friction without creating unnecessary wear. If the grout is already cracked, loose, or missing in places, aggressive scrubbing can make the problem worse. Cleaning should not substitute for repair when the grout itself is failing. Damaged areas should be evaluated and restored so water cannot penetrate behind the tile installation. Maintenance becomes much easier once the grout is structurally sound.
After cleaning, allow the shower to dry thoroughly. Some grout types benefit from periodic sealing, although the appropriate schedule depends on the grout product and installation. Sealer can reduce how readily moisture and stains penetrate porous grout, but it does not make the shower maintenance-free. Continue using proper ventilation and routine cleaning even after sealing. If you are unsure whether your grout needs sealing, check the installer or manufacturer recommendations. Properly maintained grout helps the entire shower look cleaner and can support the long-term condition of the tiled surface.
How to Remove Mildew From Shower Tiles
Mildew commonly develops in damp areas where air circulation is poor and surfaces remain wet for long periods. Shower corners, grout joints, caulk lines, and areas behind bottles are frequent problem spots. Begin by improving ventilation before applying a cleaner because good airflow makes the process safer and helps the shower dry afterward. Use a bathroom cleaner labeled for mildew and suitable for your specific tile surface. Follow the instructions carefully rather than increasing the concentration. Proper contact time is usually more important than using excessive product.
Bleach-based cleaners can be effective on certain compatible surfaces, especially for light-colored grout and caulk, but they require caution. Never mix bleach with vinegar, ammonia, acids, or other household cleaners because dangerous gases can form. Wear gloves and keep the bathroom well ventilated. Avoid splashing bleach-based products onto fabrics, colored grout, or sensitive natural stone unless the product specifically states compatibility. If you are unsure, choose a milder product first. Safe use is more important than achieving instant whitening.
Hydrogen peroxide-based mildew cleaners may provide another option for compatible tile and grout. They can help lighten organic staining without the strong odor associated with chlorine bleach. As with any cleaner, test a small area first and follow product directions. Do not combine peroxide cleaners with other chemicals in an attempt to increase cleaning strength. Treat one section at a time and rinse thoroughly. Multiple moderate treatments are preferable to experimenting with unsafe combinations.
Persistent dark staining on silicone caulk may not disappear completely even after the surface is disinfected. Mold can sometimes penetrate or stain the caulk material itself, making replacement the most practical solution. If the caulk is cracked, peeling, or permanently discolored, removing and replacing it can greatly improve the appearance of the shower. Fresh bathroom-grade caulk also helps maintain a proper seal at joints. Cleaning damaged caulk repeatedly cannot restore material that has deteriorated. Recognizing when replacement is necessary saves time and effort.
Preventing mildew requires controlling moisture after each shower. Run the bathroom exhaust fan during bathing and continue using it afterward if appropriate for your setup. Leave the shower door or curtain positioned to encourage drying when possible. Squeegee walls and remove water from ledges where it tends to collect. Wash shower curtains or liners regularly and avoid storing wet items in corners. A dry shower is much less favorable for mildew growth than one that remains humid for hours.
How to Clean Textured Shower Tiles
Textured shower tiles can be more difficult to clean because dirt settles into small grooves, ridges, and uneven patterns. A microfiber cloth alone may slide over the high points without reaching grime trapped in lower areas. Start by applying a suitable cleaner and allowing enough dwell time to loosen residue. Then use a soft or medium nylon brush to work across the texture in several directions. Circular brushing can help reach irregular depressions. Rinse thoroughly because textured surfaces can also trap cleaning solution.
Do not assume textured tile needs extremely abrasive tools. Rough scrubbers, wire brushes, and scraping tools can damage finishes while still failing to reach every recess. A quality nylon brush combined with the correct cleaner usually works better. If buildup is thick, repeat the cleaning process rather than increasing pressure dramatically. Warm water can help soften some residue before the main treatment. Patience is especially important with textured surfaces because grime may have accumulated in many tiny areas over time.
Cleaning from the top downward is useful on heavily textured shower walls. As loosened dirt and cleaner move down the surface, lower sections can become dirty again if you begin there. Work in horizontal sections and rinse each area before moving too far ahead. This keeps grime from drying back onto cleaned portions. Pay special attention to corners and horizontal edges where residue collects. A systematic approach gives more consistent results than scrubbing random spots.
Textured floor tiles may require different cleaning products from wall tiles because they often accumulate additional body oils and residue. Use a cleaner that is appropriate for wet-area flooring and does not leave a slippery film. Scrub grout lines and tile texture carefully, then rinse multiple times if necessary. After the floor dries, check whether it still feels slick. Remaining soap or cleaning residue can create a safety hazard. Clean appearance should never come at the expense of traction.
Preventive cleaning is especially valuable for textured tile because deep grooves become difficult to restore after months of buildup. A quick weekly brushing can remove residue before it hardens. Rinsing thoroughly after showers also prevents shampoo and conditioner from drying into the texture. Good ventilation helps the surface dry more completely. If the tile is naturally rough, expect it to require slightly more maintenance than glossy tile. Regular light care keeps that extra effort manageable.
How to Clean Natural Stone Shower Tiles Safely
Natural stone requires more caution because common bathroom cleaners can damage it permanently. Marble, travertine, limestone, and some other stones contain minerals that react with acids. Vinegar, lemon juice, and many acidic descaling products can etch the surface, leaving dull or rough patches that cannot simply be cleaned away. Use a pH-neutral cleaner specifically labeled for natural stone instead. Always read both the cleaner instructions and any care recommendations provided by the stone supplier. Safe chemistry is essential when cleaning expensive stone surfaces.
Start with the mildest effective approach. Warm water and a stone-safe cleaner may remove ordinary soap residue when used consistently. Apply the cleaner with a soft cloth or non-scratch sponge and avoid aggressive abrasive powders. Stone finishes can vary from polished to honed or textured, and each responds differently to friction. Test any new product in an inconspicuous area before applying it broadly. This protects against unexpected discoloration or finish changes.
Hard water stains on natural stone can be particularly challenging because many popular mineral-removing acids are unsuitable. Use a product specifically formulated to remove deposits from the type of stone in your shower. If the buildup is severe, professional stone cleaning may be safer than experimenting with strong household chemicals. Etching can look like mineral haze, so it is possible to keep cleaning a surface that is actually damaged rather than dirty. A stone-care professional can distinguish between residue and finish deterioration. Correct diagnosis prevents further harm.
Natural stone grout and sealers also require proper maintenance. Some stones are more porous than ceramic tile and may benefit from sealing according to the installer or stone manufacturer’s recommendations. Sealer can help reduce absorption but does not protect against every stain or chemical. Acid can still damage certain stone even when the surface has been sealed. Wipe spills and product residue promptly and avoid allowing water to sit for extended periods. Consistent gentle care is usually better than occasional harsh deep cleaning.
Drying natural stone after showering is especially useful because it limits mineral deposits and moisture absorption. Use a soft squeegee or microfiber cloth rather than abrasive towels. Keep personal-care products from sitting directly on porous stone shelves if they tend to leak oils, dyes, or acids. Trays can help contain residue while also making surfaces easier to wipe. Good ventilation further supports drying and reduces mildew risk. With gentle routine care, natural stone showers can remain attractive without relying on harsh cleaners.
Best Homemade Shower Tile Cleaning Methods
Homemade cleaners can be useful for light maintenance when the ingredients are compatible with the tile material. Warm water mixed with a small amount of dish soap is one of the simplest options for general grime on many ceramic and porcelain surfaces. The soap helps loosen body oils and product residue without requiring an aggressive formula. Apply it with a sponge, scrub gently, and rinse thoroughly. Using too much dish soap can create extra residue, so a small amount is enough. This basic solution is often more effective than people expect when buildup is still light.
A baking soda and water paste can help with stubborn spots on durable surfaces. Apply a thin layer to the affected area and use a non-scratch sponge or nylon brush. Avoid scrubbing with excessive pressure because baking soda is mildly abrasive. Rinse carefully after cleaning so powder does not dry in grout or textured tile. Test first on glossy or delicate finishes. Homemade does not automatically mean harmless, so surface compatibility still matters.
Vinegar diluted with water is often used to tackle soap scum and mineral residue on ceramic or porcelain tile. Its acidity helps dissolve certain deposits that ordinary soap does not remove well. However, this method should never be treated as universal because vinegar can damage natural stone. Avoid it on marble, travertine, limestone, and other acid-sensitive materials. It can also affect some grout or metal finishes with repeated exposure. When in doubt, choose a neutral cleaner rather than taking the risk.
Some people combine baking soda and vinegar because the mixture creates visible fizzing. Although the reaction looks powerful, the two ingredients largely neutralize each other chemically. The bubbling can help physically loosen some debris, but using each ingredient separately for the job it performs best can be more useful. More importantly, avoid building complicated homemade mixtures from multiple cleaning chemicals. Combining products without understanding their chemistry can be dangerous. Simple recipes are usually the safest approach.
Homemade cleaning methods work best for routine maintenance rather than severe neglect. Thick limescale, heavy mildew, deeply stained grout, or years of soap buildup may require a purpose-made product or professional cleaning. Trying to solve every bathroom problem with one household ingredient can lead to wasted effort or surface damage. Start mild, identify the type of grime, and escalate carefully when necessary. Good cleaning is not about finding one miracle mixture. It is about choosing the safest method that addresses the actual problem.
How to Keep Shower Tiles Clean Longer
A daily squeegee is one of the simplest ways to prevent shower tile buildup. Removing water from walls reduces the mineral residue left behind after evaporation. It also helps surfaces dry faster, making the shower less favorable for mildew. Start at the top and pull water downward in overlapping strokes. The entire process usually takes only a short time. This small habit can reduce how frequently you need to perform heavy cleaning.
Rinsing soap and shampoo residue from the walls after bathing also makes a noticeable difference. Personal-care products that remain on tile eventually dry into sticky film. A quick rinse removes much of that residue before it bonds to the surface. Pay particular attention to lower walls where foam tends to collect. If you have a handheld showerhead, this step becomes especially easy. Preventing residue is faster than scrubbing hardened soap scum later.
Keep bottles and shower accessories organized so water can circulate around them. Containers left directly on ledges often create rings of slime, soap residue, and mildew underneath. Use a caddy or shelf that allows drainage whenever possible. Rinse product bottles periodically because their bottoms can become sticky. Avoid overcrowding the shower with half-used containers that block cleaning access. A simpler setup is easier to maintain.
Run the bathroom exhaust fan during and after showers to reduce lingering humidity. If there is no exhaust fan, use available ventilation such as an open window when appropriate. Encourage airflow by leaving the shower enclosure positioned so surfaces can dry. Check corners and caulk regularly for early signs of mildew rather than waiting for large black patches to develop. Small problems are much easier to remove. Moisture management is one of the most important parts of bathroom cleanliness.
Schedule a light weekly cleaning even when the shower still looks reasonably clean. Spray a surface-safe cleaner, wipe or brush problem areas, rinse, and dry. This prevents residue from developing into thick layers that require intensive scrubbing. Deep cleaning should become an occasional task rather than a recurring battle. Consistency matters more than using the strongest product available. A few minutes of regular maintenance can save a significant amount of effort over time.
When Shower Tile Grime Needs Professional Help
Professional cleaning may be worthwhile when the shower has years of hardened buildup that does not respond to normal methods. Thick mineral scale, deeply stained grout, and heavily textured tile can require specialized equipment or products. A professional can also determine whether discoloration is removable dirt or permanent surface damage. This distinction is particularly useful with natural stone because etching and staining are easy to confuse. Repeated home cleaning may accomplish little when the finish itself has deteriorated. Getting the correct diagnosis can prevent wasted effort.
Persistent grout discoloration may require restoration rather than cleaning. Grout that remains dark after several safe treatments may be permanently stained or deteriorated below the surface. Professional grout cleaning, recoloring, sealing, or replacement can dramatically improve the shower’s appearance. Cracked or missing grout should also be repaired rather than simply scrubbed. Water can enter gaps and potentially create problems behind the tile. Cosmetic maintenance and structural maintenance should not be treated as the same thing.
Caulk that remains black, cracked, loose, or peeling often needs replacement. Surface cleaning cannot restore a sealant that has physically failed. Removing damaged material and applying new bathroom-grade caulk can improve both appearance and water resistance. Professional help may be useful when the joint is difficult to access or when there are signs of moisture problems behind the surface. Do not simply cover old damaged caulk with a fresh layer. Proper preparation is important for a durable seal.
Natural stone restoration is another situation where professional expertise can be valuable. If marble or travertine has been etched by acidic cleaners, additional scrubbing will not restore the original polish. Specialized honing or polishing may be required. Professionals can also identify appropriate sealers and cleaning routines for the specific stone type. This can be especially worthwhile in expensive showers where replacement would be costly. Early expert advice can prevent minor damage from becoming more extensive.
Finally, investigate persistent musty odors, recurring mold, loose tiles, or soft walls because these can indicate moisture issues beyond ordinary surface grime. Cleaning the visible tile may temporarily improve appearance without addressing water intrusion behind the installation. If the same problem returns rapidly despite good ventilation and regular cleaning, a deeper issue may be present. Professional inspection can help determine whether repairs are needed. A clean-looking shower is important, but a properly functioning waterproof system matters even more.
Frequently Asked Questions About Cleaning Shower Tiles
What is the best way to clean shower tiles?
Start by rinsing the tiles with warm water, then apply a cleaner that is safe for the specific tile material. Let it sit briefly, scrub with a non-scratch sponge or nylon brush, rinse thoroughly, and dry the surface with a microfiber cloth or squeegee.
How do you remove stubborn soap scum from shower tiles?
Use a soap-scum remover suitable for your tile type and allow enough dwell time before scrubbing. On ceramic or porcelain, mild dish soap or certain vinegar-based methods may help, but acidic cleaners should not be used on natural stone.
Can I use vinegar to clean shower tiles?
Vinegar can help remove mineral deposits and soap scum from many ceramic and porcelain tiles. Do not use it on marble, travertine, limestone, or other acid-sensitive natural stone because it can permanently etch the surface.
How do I get shower grout white again?
Use a grout-safe cleaner and a nylon grout brush to lift surface stains. If discoloration remains after thorough cleaning, the grout may be deeply stained and could require professional cleaning, recoloring, sealing, or replacement.
How often should shower tiles be cleaned?
A light cleaning once a week is usually enough for many showers, while daily rinsing and squeegeeing can reduce buildup significantly. Deep cleaning may only be needed occasionally when regular maintenance prevents soap scum, mineral deposits, and mildew from accumulating.