Meta Title: Outdoor Living Project Planning: A Step-by-Step Guide
Meta Description: Plan your outdoor living project with practical steps for budgeting, layout, materials, permits, contractors and a smoother backyard build.
How to Plan an Outdoor Living Project That Fits Your Life
A successful Outdoor Living Project starts with more than collecting attractive patio pictures. You need a practical plan that connects your available space, preferred activities, household needs and realistic budget. Deciding how the area should function before selecting products helps you avoid building a beautiful backyard that does not support your daily routine.
Think of the backyard as another part of your home rather than an unrelated exterior area. Just as an indoor floor plan includes rooms for different activities, your outdoor layout can include separate spaces for cooking, dining, relaxing and entertaining. This approach makes even a compact backyard feel more organised and useful.
Early planning also helps you identify practical issues before construction begins. Drainage, sunlight, privacy, utility access, property boundaries and movement between the house and yard can affect nearly every design decision. Understanding these conditions allows you to choose features and materials that work with your property instead of fighting against it.
This guide explains how to plan your project from the first idea to the final walkthrough. You will learn how to assess your backyard, establish priorities, create an outdoor living budget, develop a functional layout and work with contractors. Each step is designed to help you make confident decisions while controlling unnecessary costs and delays.
Set Your Goals
Begin by deciding why you want to improve your outdoor space. Some homeowners want a quiet retreat, while others need an outdoor entertainment area for family gatherings. You may also want a practical place for cooking, gardening, exercising or watching children play. A clear purpose gives the entire project a useful direction.
Write down the activities you expect to enjoy outdoors most often. Consider how many people normally use the space, how frequently you entertain and whether the area will be used during the day or evening. Your answers will help determine the amount of seating, shade, lighting, storage and open floor space you need.
Separate your essential features from your optional additions. A safe patio surface, comfortable seating and dependable lighting may be essential, while a fireplace, television or outdoor bar could be added later. Ranking features prevents attractive extras from consuming money that should support the most important parts of your backyard design.
Create a short project statement that summarises your goal. For example, you might want “a low-maintenance outdoor living room for six people with shade, dining space and safe evening lighting.” This simple description becomes a useful reference when comparing layouts, products and contractor proposals throughout the planning process.
Assess Your Backyard
Measure the usable length and width of your yard before developing detailed outdoor living space ideas. Mark the position of doors, windows, trees, fences, slopes, drains, utility equipment and existing structures. Accurate measurements help you understand what will fit comfortably without making pathways or seating areas feel crowded.
Study how sunlight moves across the property during different times of the day. A dining space exposed to strong afternoon sun may need a pergola, covered patio or shade tree. A dark corner may be better suited to storage or planting. Seasonal changes should also influence where you place permanent features.
Observe how water behaves after heavy rain or irrigation. Look for standing water, soil erosion, wet areas near the foundation and runoff moving toward neighbouring properties. Drainage problems should be addressed before installing patios, kitchens or retaining walls because later repairs may require removing completed surfaces.
Review privacy, noise and surrounding views from several positions. A strategically placed screen, hedge or structure can block an unwanted view without closing the entire yard. At the same time, preserving a pleasant view or mature tree can make your final landscape design feel established, comfortable and connected to its surroundings.
Set Your Outdoor Living Budget
A realistic Outdoor Living Project budget should cover more than visible products such as pavers, appliances and furniture. It may also need to include design fees, site preparation, excavation, drainage, electrical work, plumbing, permits, labour and waste removal. Including these categories early creates a more accurate financial plan.
Decide on a comfortable spending range rather than selecting one rigid number. Your lower figure should cover the essential version of the project, while the upper figure represents the most you are prepared to invest. This range gives you flexibility when comparing different materials, sizes and construction methods.
Reserve part of the budget for unexpected conditions and small changes. Hidden roots, poor soil, damaged drainage lines or material substitutions can affect the final cost. A contingency fund allows the project to continue without forcing you to remove important features or rely on rushed financial decisions.
Request itemised estimates so you can see how much each feature contributes to the total. Current project-planning guidance recommends considering the budget and timeline together because design complexity, labour, product availability and site conditions can affect both.
Plan the Backyard Layout
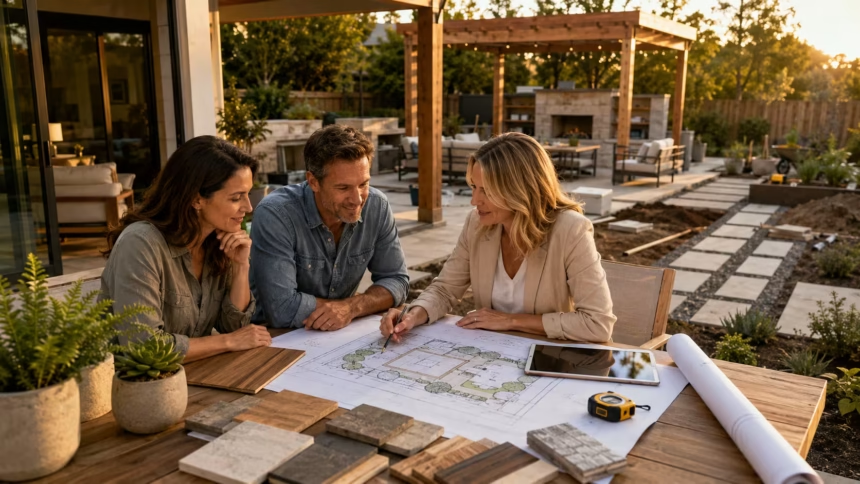
Draw a simple overhead plan using your measurements. You can use graph paper, a garden design application or a professional landscape plan. Add permanent features first, including the house, doors, fences and trees. Then test different locations for patios, paths, seating areas and cooking zones.
Create separate activity zones without making the yard feel divided into small boxes. An outdoor dining area can sit near the kitchen door, while lounge seating may face a garden, fireplace or attractive view. Open lawn or play space should remain easy to supervise and reach without crossing cooking areas.
Plan comfortable movement between every zone. Main paths should feel direct and natural, especially between the house, dining table, grill and seating area. Avoid placing furniture where it blocks doors or forces guests to squeeze through narrow spaces. Good circulation makes the backyard feel larger and easier to use.
Test the proposed layout before construction by marking it on the ground. Use spray chalk, stakes, string, cardboard or temporary furniture to represent patios and major features. Walk through the arrangement, open nearby doors and imagine people using the space. This simple exercise can reveal layout problems that are difficult to notice on paper.
Choose Outdoor Living Features
Select features according to your goals rather than current design trends alone. A family that regularly hosts meals may benefit from a large dining table and outdoor kitchen. Someone seeking a quiet retreat may prefer comfortable seating, soft landscaping and a water feature. Every addition should support a genuine activity.
For an outdoor kitchen, consider how food will move from indoor storage to preparation, cooking and serving areas. A basic setup may only require a grill, counter and weather-resistant storage. A larger design might include refrigeration, a sink, power outlets and task lighting, but each utility will add planning and installation requirements.
A fire pit area can create a natural gathering point, but it requires careful placement. Consider seating distance, nearby plants, overhead structures, wind direction and local fire regulations. Select a feature that fits the available space instead of forcing an oversized fireplace or fire table into a narrow patio.
Pools, spas, pavilions and permanent kitchens require more coordination than movable furniture. Their size and location can influence drainage, access, utilities and future construction phases. Place the largest or least flexible elements first, then arrange smaller features around them to create a balanced and practical layout.
Pick Durable Patio Materials
Choose outdoor materials according to climate, maintenance requirements, appearance and daily use. Natural stone, concrete, porcelain, brick, gravel, composite decking and concrete pavers each offer different benefits. The best patio material is one that fits your property conditions and the amount of maintenance you are prepared to handle.
Consider how the surface will feel in real situations. A material may become hot under direct sun, slippery when wet or uncomfortable for bare feet. Families with children, older relatives or pool users should prioritise stable surfaces, safe transitions and appropriate slip resistance alongside colour and visual style.
Match the scale and style of the material to your home. Large-format pavers may complement modern architecture, while brick or natural stone can suit a traditional property. Repeating colours or textures from the house exterior helps the new area look connected rather than appearing like a separate structure added later.
Ask how the material will age and how repairs will be handled. Some products can be replaced individually, while others may show visible patches after repair. Confirm cleaning needs, sealing requirements, warranties and expected colour changes before purchasing. Long-term maintenance should be part of the selection process, not an afterthought.
Add Shade and Comfort
Shade can determine whether your outdoor living room is used regularly or avoided during the hottest part of the day. Permanent options include roof extensions, pavilions and pergolas, while flexible solutions include umbrellas, retractable awnings and shade sails. Select coverage according to sun direction and seasonal weather.
Plan for wind, rain and cooler temperatures as well as sunlight. Screens, outdoor curtains, ceiling fans, heaters and covered seating can extend the useful season of the space. However, each comfort feature should suit your local climate rather than copying a design created for very different weather conditions.
Choose patio furniture that fits the available area and leaves enough room for movement. Deep seating may look inviting but can overwhelm a small patio. Measure tables, chairs and sectionals before finalising the hardscape dimensions, allowing additional room for chairs to be pulled out and people to pass behind them.
Include convenient surfaces and storage throughout the layout. Side tables, serving counters and weather-resistant cabinets make the space easier to use. Storage for cushions, grilling equipment, toys and gardening tools also helps the completed backyard remain organised rather than becoming cluttered after the first few weeks.
Plan Lighting and Utilities
Outdoor lighting should support safety, practical tasks and atmosphere. Path lights can make steps and walkways easier to navigate, while task lighting helps with cooking and serving. Softer fixtures around seating and planting areas can make the space feel inviting without flooding the entire backyard with harsh brightness.
Create lighting layers instead of relying on one powerful fixture. Combine permanent lighting for paths and cooking zones with decorative options around dining and lounge areas. Professional design guidance often recommends prioritising dependable task lighting for steps and safety features while using softer fixtures to establish mood.
Identify electrical, gas, water and internet requirements during the design stage. Outlets may be needed for appliances, televisions, speakers, chargers, pumps or seasonal decorations. Installing conduit or utility lines before pouring concrete can prevent expensive cutting and repairs if you decide to add another feature later.
Make sure outdoor electrical and plumbing work is completed by qualified professionals according to local requirements. Discuss shut-off points, drainage, weather protection and future maintenance access. Utilities should remain safe and serviceable without requiring the removal of fixed cabinets, expensive paving or permanent landscape features.
Check Permits and Contractors
Contact your local planning or building authority before starting structural work. Requirements may apply to decks, roofed structures, retaining walls, electrical systems, plumbing, pools, fireplaces and property setbacks. Rules vary considerably, so advice from another homeowner or an online discussion should not replace local confirmation.
Review any neighbourhood or homeowners’ association requirements as well. Restrictions may affect fence heights, visible structures, exterior materials, construction hours and equipment access. Securing approval before ordering custom products reduces the risk of delays, redesign costs or disputes after work has already started.
When hiring a contractor, compare more than the lowest price. Review relevant projects, verify insurance and licensing where required, request references and ask who will supervise the site. A contractor experienced in outdoor construction should understand grading, drainage, foundations, utilities and material installation, not only decorative landscaping.
Request a written proposal that defines the scope, products, payment stages, estimated schedule and responsibilities. It should also explain how changes, delays, damaged property and cleanup will be handled. Clear documentation helps both parties understand the agreement and reduces confusion when several trades are working on the project.
Create a Project Timeline
An Outdoor Living Project timeline should include design, estimates, approvals, material ordering, site preparation, construction and final inspections. Do not plan only around the visible installation period. Permits, custom products and contractor availability can add significant preparation time before physical work begins.
Break the schedule into clear phases and identify dependencies. Drainage, foundations and utility lines normally need attention before finished surfaces, appliances or planting. Ordering decisions should also follow the construction sequence so materials arrive when there is safe space to store and install them.
Allow flexibility for weather, inspections and unexpected site conditions. Published planning guidance shows that outdoor construction timelines vary according to project size, design complexity, permits and weather. For that reason, a dependable schedule should use realistic ranges rather than promising one fixed completion date.
Consider building the project in phases when the complete plan exceeds your current budget. Create the full master layout first, then decide which features can be added later without damaging completed work. Preparing future utility lines or foundations during the first phase may prevent unnecessary demolition during the next stage.
Prepare for Construction
Before work begins, remove personal items and identify plants or structures that must be protected. Confirm how workers and equipment will access the backyard. Narrow gates, soft ground, overhead wires and shared driveways can affect the machinery used and the time required to move materials.
Discuss daily site management with the contractor. Agree on working hours, material storage, waste removal, temporary fencing and access to water or electricity. Homeowners with children or pets should establish clear safety boundaries because excavations, tools and partially completed surfaces may remain exposed between workdays.
Check major dimensions and material selections before permanent installation. Confirm patio elevations, step locations, kitchen placement, fixture finishes and furniture clearances. It is easier to move a marker or revise a drawing than to relocate plumbing, rebuild masonry or remove newly installed paving.
Keep a project folder containing the design, contract, approvals, invoices, product details, warranties and progress photographs. Record approved changes in writing along with their effect on the price and schedule. Organised documentation makes it easier to resolve questions and maintain the finished space in the future.
Finish the Space
Complete the main construction before buying every decorative item. Once the patio, structures and major features are installed, you can see the actual scale, sunlight and movement patterns. This makes it easier to select furniture, planters and accessories that fit the finished area without creating unnecessary clutter.
Use outdoor furniture to strengthen the purpose of each zone. Face lounge chairs toward a fireplace, garden or view, and place dining furniture close to cooking and serving areas. Outdoor rugs, cushions and side tables can visually define spaces while keeping the overall arrangement flexible.
Choose plants that suit the light, soil, climate and available maintenance time. Use a mixture of structural greenery, seasonal interest and lower-growing plants near paths. Avoid placing thorny, poisonous or strongly invasive species where children, pets or guests are likely to come into regular contact with them.
Finish with a practical walkthrough rather than focusing only on appearance. Test lighting, outlets, drainage, appliances, gates and irrigation. Sit in every seat, walk through each pathway and check storage access. Small adjustments made at this stage can make the backyard noticeably easier and more enjoyable to use.
Plan Your Outdoor Living Project with Confidence
A successful backyard transformation begins with a clear understanding of how you want to use the space. Defining activities, priorities and user needs prevents the design from becoming a collection of unrelated features. Your goals should guide decisions about layout, materials, furniture, lighting and landscaping.
Detailed site assessment and financial planning provide the foundation for a smoother build. Accurate measurements, drainage observations, realistic cost estimates and a sensible contingency fund help you prepare for challenges. These steps may feel less exciting than choosing furniture, but they protect the quality of the final result.
A complete master plan is valuable even when construction must happen in stages. It allows utilities, structures and pathways to be positioned with future improvements in mind. You can invest first in essential elements while knowing that later additions will support the same organised backyard design.
The best Outdoor Living Project is not necessarily the largest or most expensive one. It is the project that fits your property, lifestyle, climate and budget while remaining comfortable to maintain. Plan carefully, confirm the practical details and make each decision according to how the completed space will actually be used.
Frequently Asked Questions
What should I plan first for an outdoor living space?
Begin by defining how you want to use the area, who will use it and which features are essential. Then measure the yard and assess sunlight, drainage, access, privacy and existing structures.
How much does an outdoor living project cost?
The cost depends on the project size, site conditions, materials, labour and selected features. Establish a spending range, request itemised estimates and reserve money for unexpected site work or design changes.
Do I need a permit for an outdoor living project?
Permits may be required for decks, covered structures, retaining walls, pools, plumbing, gas lines or electrical work. Confirm the requirements with your local authority before ordering materials or beginning construction.
How long does an outdoor living project take?
A simple patio may require less time than a project involving structures, utilities or custom features. Design approvals, permits, contractor availability, weather and material lead times should all be included in the schedule.
Which outdoor living features should I add first?
Prioritise foundational features such as drainage, patios, pathways, utilities and shade. Furniture, decorative lighting, planters and other flexible additions can usually be purchased or upgraded after construction is complete.