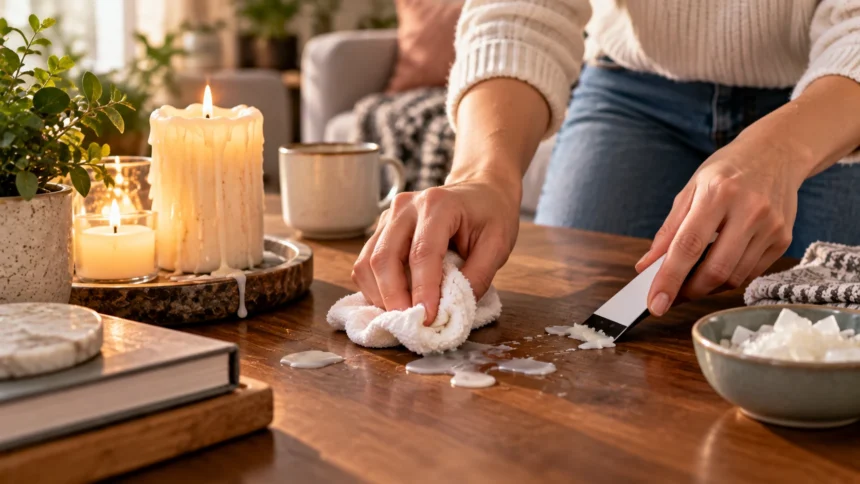
How to Remove Candle Wax From Almost Any Surface
Candle wax can turn a relaxing evening into a frustrating cleaning job when it drips onto furniture, fabric, carpet, walls, floors, or countertops. The good news is that dried candle wax is usually easier to remove than it first appears, especially when you match the cleaning method to the surface. Some materials respond best when the wax is hardened with ice and gently lifted away, while others can tolerate controlled heat that softens the wax for absorption. The wrong method, however, can spread melted wax, damage finishes, or push colored wax deeper into porous material. Learning how to remove candle wax correctly can save both time and unnecessary scrubbing.
The safest approach begins by identifying what the wax landed on before reaching for a hair dryer, iron, scraper, or cleaning solution. Finished wood needs different care than glass, and upholstery needs a gentler approach than tile or metal. Colored and scented candles can also leave behind oily or dyed residue even after the solid wax has disappeared. That means removing the visible wax is often only the first stage of cleanup. The second stage involves treating any remaining grease, pigment, or surface haze without damaging the material underneath. Working slowly is usually more effective than using excessive heat or aggressive scraping.
Most candle wax removal methods rely on one of two principles: making the wax colder or making it warmer. Cold temperatures harden wax so that it becomes brittle and easier to lift or chip away, making the ice method useful on many solid surfaces and fabrics. Gentle heat softens wax so that absorbent material can pull it away, which is particularly helpful for carpets and certain washable textiles. Neither method is universally safe, so testing a hidden area is always wise. The sections below explain how to remove candle wax from common household surfaces while minimizing stains, scratches, discoloration, and damage.
Start With the Right Candle Wax Removal Method
The first step is usually to resist the urge to wipe fresh liquid wax immediately. Hot candle wax spreads easily, and wiping it can push the material farther across a tabletop, deeper into fabric fibers, or into the texture of a wall or floor. Unless the wax presents an immediate safety concern, allowing it to cool and solidify often makes removal much simpler. Once hard, a large portion can often be lifted away in a single piece rather than smeared over a wider area. This is especially useful on wood, tile, stone, glass, and many fabrics. Waiting a few minutes can therefore prevent a small spill from becoming a larger stain.
The cold method works by making wax harder and more brittle. Place ice cubes in a sealed plastic bag and hold the bag against the wax rather than placing wet ice directly on the surface. After several minutes, the hardened wax can often be lifted with a plastic card, spoon edge, or another blunt tool. Plastic tools are generally safer than metal knives because they are less likely to scratch delicate finishes. Work from the outside edge of the wax toward the center instead of forcing the tool underneath aggressively. If the wax begins to soften while you work, apply the cold pack again before continuing.
Heat can be useful when wax has penetrated fibers or remains as a thin film that cannot easily be scraped away. A hair dryer on a low or moderate setting provides more control than an open flame or extremely hot appliance. In some fabric and carpet situations, an iron may be used indirectly with absorbent paper or cloth between the heat source and the wax. The goal is to warm the wax just enough for another material to absorb it rather than liquefying it completely. Too much heat can spread colored wax, damage synthetic fibers, soften finishes, or create burns. Short periods of gentle heat are therefore safer than prolonged exposure.
Before using any solvent or cleaner, test it on an inconspicuous area of the surface. Rubbing alcohol, mild dish soap, specialty stain removers, and other cleaning products can affect dyes, painted finishes, sealants, and fabrics differently. Even products considered gentle can leave marks if the underlying material is delicate or poorly sealed. A hidden test allows you to confirm that the surface does not fade, soften, become cloudy, or develop a ring. Use only a small amount of cleaner rather than soaking the area. Candle wax removal is often more successful when mechanical removal comes first and liquid cleaners are reserved for the remaining residue.
The type of candle matters as well because wax composition can influence the cleanup process. Paraffin, soy wax, beeswax, and blended candle formulations may soften at different temperatures and can leave different amounts of oily residue. Colored candles introduce dye that can transfer into porous surfaces, while heavily scented wax may contain fragrance oils that remain after the wax itself is removed. You do not usually need to identify the exact wax formula before cleaning, but you should expect possible residue when the candle is colored or strongly scented. Removing the bulk wax gently gives you a better chance of treating any remaining stain separately without spreading it.
How to Remove Candle Wax From Wood Furniture and Floors
Wood requires a careful approach because excessive scraping can scratch the surface while high heat can damage varnish, lacquer, paint, or other finishes. Allow the wax to cool fully before attempting to remove it from a table, shelf, cabinet, or wood floor. If necessary, place a sealed bag of ice over the wax for several minutes to make it firmer. Once hardened, gently lift the edge with a plastic card or plastic scraper held almost flat against the surface. Avoid digging downward because that increases the chance of gouging the wood. Removing several thin layers is safer than trying to force the entire wax deposit off at once.
After the thicker wax has been lifted, a thin residue may remain on the wood finish. A hair dryer set to low heat can help soften this film, but keep the dryer moving and several inches away from the surface. As the wax becomes slightly soft, blot it with a clean, absorbent cloth rather than rubbing it across the wood. Turn the cloth frequently so that you continue absorbing wax instead of transferring it back onto the surface. Stop heating as soon as the residue begins releasing. Long exposure to concentrated heat can dull certain finishes or cause unwanted changes in the appearance of the wood.
Once the visible wax is gone, clean the area according to the care requirements of the wood finish. A lightly damp microfiber cloth may be enough for sealed furniture or flooring, followed immediately by a dry cloth. If an oily film remains, a very small amount of mild dish soap diluted in water may help on many sealed surfaces, but excessive moisture should be avoided. Never flood wood with water because moisture can seep into joints, cracks, or unfinished areas. Unsealed, antique, or highly valuable wood deserves extra caution because common household cleaning methods can permanently alter the surface. Professional restoration advice may be safer when the finish is uncertain.
Colored candle wax can leave a pigment stain even after all solid material has been removed. Do not immediately reach for strong bleach, acetone, or abrasive products, since these can remove or discolor the wood finish more effectively than they remove the stain. Begin with the gentlest cleaner recommended for that particular type of finished wood. Sometimes the remaining mark is actually wax trapped in small surface textures rather than permanent dye, so another short application of gentle warmth and blotting may improve it. If the discoloration does not respond, stop before damaging the finish. Refinishing a small area may ultimately be preferable to aggressive chemical treatment.
Wood floors require an additional consideration because they may have protective coatings that respond differently from furniture finishes. Engineered hardwood, solid hardwood, laminate, and wood-look flooring should not automatically receive the same cleaning treatment. On most finished hard surfaces, hardening and gently lifting the wax remains the safest starting point. Avoid steel wool, razor blades, and harsh scouring pads because even small scratches can become visible under light. After removal, clean the area with the floor product normally recommended by the manufacturer. A patient cold-and-lift approach usually protects the floor better than trying to melt a large wax puddle and wipe it away.
How to Remove Candle Wax From Carpet and Upholstery
Carpet wax removal can feel difficult because melted wax surrounds individual fibers rather than sitting entirely on the surface. Start by letting the spill cool completely, then place a sealed ice pack or bag of ice over the hardened wax for several minutes. Once brittle, carefully break the larger deposit into smaller pieces using a spoon or blunt plastic tool. Pick up the loosened fragments by hand and vacuum the area to collect tiny pieces. Avoid pulling aggressively on carpet fibers because this can distort the pile. Removing as much solid wax as possible before using heat reduces the amount that can spread during the next stage.
Remaining wax embedded in carpet fibers can often be transferred into an absorbent material with carefully controlled heat. Place plain white paper, an unprinted paper towel, or a clean absorbent cloth over the residue. Apply gentle warmth according to the carpet material, keeping the temperature low enough to avoid melting or scorching synthetic fibers. As the wax softens, it should begin transferring into the absorbent layer above it. Replace the paper or move to a clean section repeatedly rather than leaving wax-saturated material in place. Continue only until wax stops transferring. Excessive heating can damage carpet backing, synthetic fibers, or stain-resistant treatments, so patience is important.
A colored candle may leave a noticeable stain after the wax has been removed. Treat this as a separate carpet-stain problem rather than continuing to apply heat, because additional heat can encourage pigment to move deeper into the fibers. Blot the area with an appropriate carpet-cleaning solution that has first been tested in a hidden location. Work from the outside of the stain toward the center to reduce spreading. Avoid vigorous scrubbing because friction can damage carpet texture and enlarge the affected area. Rinse or blot according to the cleaner’s directions, then remove excess moisture with clean towels. Persistent dye stains may require professional carpet cleaning.
Upholstery should be approached even more cautiously because sofas, chairs, and cushions contain different fabrics and internal materials. Check the furniture care label before applying water, solvents, or heat. Some upholstery fabrics tolerate water-based cleaners, while others require solvent-based professional cleaning or should not be spot cleaned at home. Begin by hardening and carefully lifting solid wax whenever the fabric allows it. If heat is appropriate, use the lowest effective temperature with an absorbent barrier and avoid saturating the cushion underneath. Moisture trapped inside upholstered furniture can create rings, odors, or other problems that are more difficult to correct than the original wax spill.
For delicate upholstery such as velvet, silk, antique fabric, or materials with uncertain care instructions, home wax-removal techniques can carry significant risk. Heat may alter texture or sheen, while scraping can crush fibers or pull threads. Strong cleaners can also create permanent color changes that are more noticeable than the wax itself. In these situations, remove only loose hardened pieces that lift away without force and then consider contacting an upholstery professional. Tell the cleaner what type and color of candle caused the spill if known. Professional treatment is especially worthwhile when the item is expensive, sentimental, antique, or made from a material that cannot easily be replaced.
How to Remove Candle Wax From Clothes and Washable Fabric
Candle wax on clothing should usually be allowed to harden before treatment because wiping soft wax drives it farther between textile fibers. If the garment can tolerate cold, place it in the freezer briefly or hold a sealed ice pack against the affected area until the wax becomes firm. Bend the fabric gently around the hardened deposit to loosen larger pieces, then lift them away using a spoon or dull plastic edge. Avoid stretching delicate fabric or scraping aggressively. The objective is to remove as much wax as possible mechanically before treating what remains inside the fibers. Check the garment’s care label before moving on to heat or stain-removal products.
For washable fabrics that tolerate ironing, residual wax can sometimes be drawn out with gentle heat and absorbent material. Place the stained area between clean, plain absorbent sheets or cloths and use a low setting appropriate for the fabric. The heat should soften the wax enough for it to transfer away from the garment rather than flooding the surrounding fibers. Change the absorbent material frequently as wax appears on it. Never use a high temperature simply to make the process faster, particularly with polyester, nylon, or other heat-sensitive fabrics. If the care label warns against ironing, skip this method and use a safer alternative suited to that textile.
After removing the wax, inspect the fabric carefully for an oily or colored stain. Candle fragrances, dyes, and wax ingredients can leave marks that ordinary wax removal does not eliminate. Apply a laundry stain treatment appropriate for the fabric and allow it to work according to its directions before washing. A small amount of liquid laundry detergent may also help break down oily residue on many washable garments. Wash at the warmest temperature permitted by the care label rather than automatically using hot water. Heat from washing or drying can make some stains harder to correct, so check the garment before placing it in a dryer.
If a stain remains after washing, allow the garment to air-dry and repeat the treatment rather than using a tumble dryer immediately. Dryer heat can set dye, oil, or other residue into the fabric, making the mark much more difficult to remove later. Colored candle wax is especially likely to require more than one treatment because both wax and pigment must be addressed. White fabric may offer more cleaning options than colored fabric, but bleaching should only be used when the care label allows it. Always treat the specific fabric rather than assuming every white garment can tolerate strong products. Slow repeated treatment is often safer than one aggressive cleaning attempt.
Dry-clean-only clothing, structured garments, silk, wool, and delicate textiles deserve professional care when candle wax has soaked into the fibers. Scraping away loose hardened wax is generally reasonable if it can be done without damaging the material, but home solvents and irons may create rings, shine, shrinkage, or color loss. Do not wash a dry-clean-only item simply because the wax spill appears small. Place the garment in a clean bag and point out the stained area when taking it to the cleaner. Mention that the mark came from candle wax and note whether the candle was strongly colored or scented. That information can help the cleaner select an appropriate treatment.
How to Remove Wax From Glass, Metal, Ceramic, and Candle Holders
Glass is one of the easier surfaces for candle wax removal because it is smooth and nonporous, but temperature changes require caution. If wax has spilled onto a glass tabletop or sturdy decorative object, allow it to cool and then gently lift it using a plastic scraper. Small remaining patches may release after gentle warming with a hair dryer and wiping with a soft cloth. Avoid striking or aggressively scraping glass with metal tools, which can leave scratches or chips. Very cold ice applied directly to warm glass can also create thermal stress. Let the glass reach normal room temperature before using any temperature-based cleaning method.
Candle jars and glass holders often contain a thick layer of leftover wax at the bottom. One approach is to cool the container so the wax contracts and becomes easier to remove as a solid piece. Another is to gently warm the container enough to soften the wax for removal, but sudden extreme temperature changes should be avoided because glass can crack. Never pour boiling water into thin, damaged, or unknown glass simply to release wax. Once the main wax is removed, wash remaining oily residue with warm water and dish soap if the container is suitable for washing. Remove wick tabs carefully rather than forcing sharp tools against the glass.
Metal candle holders, trays, and decorative pieces can usually tolerate more mechanical removal than delicate wood or fabric, but the finish still matters. Painted, plated, antique, or polished metal can scratch or discolor even when the underlying metal is strong. Allow the wax to harden, then lift it with a plastic tool or fingernail before considering heat. Mild warmth from a hair dryer can soften thin residue, which can then be wiped away with an absorbent cloth. Follow with a cleaner appropriate for the metal finish. Avoid abrasive powders or steel wool unless the item’s care instructions specifically allow them, because scratches can permanently change polished surfaces.
Glazed ceramic and porcelain are generally straightforward to clean when their surfaces are intact. Harden the wax and gently scrape it away with a plastic tool, then wash away any remaining film with warm water and mild dish soap. Be more cautious with unglazed pottery because porous ceramic can absorb wax and oil below the surface. Aggressive heating may drive the residue deeper rather than bringing it out. Antique or hand-painted ceramics may also contain finishes that react badly to solvents, heat, or prolonged soaking. When the value or finish is uncertain, use minimal moisture and stop if you notice color transfer, softening, or changes in sheen.
Mirrors and polished decorative surfaces require the same gentle mindset because even a tiny scratch can remain highly visible. Avoid razor blades unless a manufacturer specifically recommends them for that exact surface, as coatings on mirrors and specialty glass can be damaged. Harden thicker wax first and lift it with a plastic card held at a shallow angle. For a remaining wax haze, mild warmth and a microfiber cloth can often remove more than aggressive scraping. Finish with the normal glass or surface cleaner after all wax has been removed. Separating wax removal from final polishing helps prevent the oily residue from being smeared across a larger reflective area.
How to Remove Candle Wax From Walls, Countertops, Tile, and Stone
Wax on a painted wall should be handled gently because removing the wax is pointless if the paint comes off with it. Allow the spill to harden and lift the thickest pieces using a plastic card without digging into the wall surface. A hair dryer on a low setting can soften the remaining film, allowing it to be blotted with an absorbent cloth. Keep the heat moving rather than concentrating it on one spot, especially on older or low-quality paint. Once the wax is gone, lightly clean the area with a method appropriate for the paint finish. Matte and flat paints are generally more prone to visible rubbing marks than tougher washable finishes.
Colored wax can leave a particularly stubborn mark on painted walls because the pigment may transfer into the paint surface. Begin with the mildest cleaning option, such as a damp microfiber cloth with a tiny amount of gentle soap when the wall finish permits it. Do not scrub aggressively, since friction can create a shiny patch on matte paint or remove color. Strong solvents can soften paint and make the affected area larger. If the dye has permanently stained the coating, a small paint touch-up may produce a better result than repeated chemical treatment. Saving leftover wall paint after decorating can therefore make accidents like candle splashes much easier to repair.
Tile is usually easier because glazed ceramic and porcelain tiles resist wax absorption. Let the wax become fully solid, then lift it with a plastic scraper and wipe away minor residue with warm water and mild detergent. Grout requires more attention because it is often porous and may trap small amounts of wax or candle dye. Avoid forcing soft wax deeper into grout lines with a cloth. Cooling and gently lifting the material first is usually more effective. If pigment remains in light-colored grout, use a grout-safe cleaning method that is compatible with any sealer present. Different grout products have different chemical tolerances, so aggressive acids or bleach should not be your automatic first choice.
Countertop cleaning depends strongly on the material. Laminate, solid-surface materials, quartz, sealed granite, marble, concrete, and butcher block all respond differently to heat, scraping, and cleaning chemicals. On most hard counters, allowing wax to cool and lifting it gently with plastic is the safest starting point. Avoid placing a very hot iron or heating appliance directly on the countertop, since heat can damage resin, coatings, sealants, or stone treatments. Follow with a cleaner recommended for the particular surface. If you are unsure what the countertop is made from, choose cold mechanical removal over aggressive heat or solvent methods until the material can be identified.
Natural stone deserves special caution because some varieties are porous and sensitive to common household cleaners. Marble, limestone, travertine, granite, and other stones may also have sealers that can be affected by heat or chemicals. Remove hardened wax from the surface gently without using metal tools. If an oily shadow remains, a stone-specific stain treatment may be necessary, particularly when scented or colored wax has penetrated the pores. Avoid acidic cleaners such as vinegar on acid-sensitive stone because they can etch the surface. Valuable stone countertops or floors may be worth treating professionally if the stain has absorbed deeply, since correcting chemical damage can be far more expensive than removing wax.
Removing Colored Wax, Oily Residue, and Stubborn Wax Stains
The most frustrating candle spills are often those involving dark red, blue, green, purple, or heavily scented wax. Once the solid wax is removed, a colored shadow may remain because dye or fragrance oils have transferred into the surface. Treat this remaining mark as a stain rather than continuing to scrape for wax that is no longer present. The correct treatment depends completely on whether the surface is carpet, fabric, wood, stone, paint, or another material. Start with a cleaner known to be safe for that surface and use the minimum amount required. Always blot rather than spread the stain, particularly on absorbent fabrics and porous materials.
Oily residue can appear even when the candle wax was white or uncolored. Soy wax, fragrance oils, beeswax blends, and other candle ingredients may leave a slick area or darker-looking patch after the solid material disappears. Mild dish soap can help break down oily residue on many washable, nonporous surfaces because it is designed to disperse grease. However, soap and water are inappropriate for some delicate fabrics, unfinished wood, electronics, and specialty finishes. Apply cleaning solution to a cloth rather than pouring it directly onto sensitive materials. Follow with careful blotting or wiping so that excess moisture does not become a second cleaning problem.
Repeated small treatments are usually safer than trying to remove a stubborn candle wax stain in one attempt. After each cleaning cycle, allow the surface to dry completely before deciding whether the stain remains. Wet carpet, fabric, wood, or stone often looks darker than it will once dry, which can lead people to keep cleaning unnecessarily. Repeated scrubbing while the area is wet may damage fibers or finishes without improving the final result. Good lighting can help you distinguish between remaining wax, oily residue, dye, and actual surface damage. Identifying what is left determines whether more cleaning is useful or whether the material has already been permanently altered.
Avoid mixing household cleaning chemicals in an attempt to create a stronger wax remover. Products containing bleach, ammonia, acids, solvents, or other active ingredients can react dangerously or damage surfaces when combined. Candle wax itself rarely requires powerful chemistry because most of the material can be removed through temperature control and gentle mechanical lifting. Chemical cleaners are mainly useful for the residue that remains afterward. Use one suitable product at a time and follow its label instructions. If the product does not work, rinse or remove it appropriately before trying another method rather than layering cleaners together on the same surface.
Professional cleaning becomes reasonable when the wax has affected expensive carpet, antique furniture, natural stone, delicate upholstery, valuable clothing, or an unusual finish. A professional may have access to controlled solvents, extraction equipment, specialty stain treatments, or repair techniques that are difficult to reproduce safely at home. Professional help can also be worthwhile when a large candle has spilled across a wide area rather than leaving a small spot. Provide as much information as possible about the candle type, color, surface, and cleaning products already used. Knowing previous treatment prevents the cleaner from unknowingly combining incompatible products or repeating a method that has already altered the material.
Preventing Candle Wax Spills and Making Cleanup Easier
Prevention starts with placing candles on stable, heat-resistant holders that are large enough to catch wax before it reaches furniture. Narrow holders that barely fit the candle may allow melted wax to drip over the edge, particularly when a candle burns unevenly. Decorative trays can provide an additional protective barrier beneath multiple candles. Place candles well away from the edge of tables where they can be bumped by hands, clothing, pets, or moving objects. A stable location also reduces fire risk, which is far more important than preventing a wax stain. Never leave a burning candle unattended simply because it appears securely positioned.
Drafts are another common cause of uneven candle burning and wax drips. Air from fans, open windows, air-conditioning vents, or frequently opened doors can push the flame to one side, causing uneven melting. Moving the candle away from strong airflow can help it burn more consistently and reduce wax running down the outside. Trim the wick according to the candle maker’s recommendations before lighting because an excessively long wick can produce a larger, less stable flame. Always follow the candle’s own safety instructions regarding burn time and placement. Good candle care supports both cleaner burning and safer use.
Protective surfaces are particularly useful when candles are part of dining tables, holiday decorations, weddings, events, or other situations where multiple flames are used. A washable tray, glass plate, or appropriate candle holder can catch drips before they reach table linens or furniture. For wax-prone taper candles, choose holders designed to support the candle securely and collect runoff. Avoid balancing candles inside improvised containers that can tip or overheat. If using candles near fabric, curtains, decorations, or greenery, remember that wax damage is only one concern. Fire safety should always determine placement before appearance or convenience.
If a spill occurs, act safely rather than quickly. Extinguish nearby flames first and allow dangerously hot wax or surfaces to cool before beginning cleanup. Do not try to catch falling melted wax with bare hands because hot wax can cause burns. Once conditions are safe, decide whether the affected surface benefits from hardening or gentle warming. Keeping plastic scrapers, microfiber cloths, plain absorbent paper, and a reusable cold pack available can make future cleanup easier. These simple tools handle many wax spills without the need for harsh cleaners or expensive specialty products.
The best candle wax removal strategy is ultimately one that protects the surface rather than merely removing the wax as fast as possible. Cold is usually helpful when you want to lift a thick deposit, while controlled warmth can help transfer thin residue from fibers or textured surfaces. Scraping should be gentle, and cleaning chemicals should be chosen for the material underneath rather than the wax alone. Colored candle stains may require a second cleaning stage after the solid wax disappears. With patience and the right technique, wax can be removed successfully from most household surfaces without permanent damage. When the surface is valuable or delicate, stopping early and seeking professional help is often the smartest choice.
Frequently Asked Questions About Removing Candle Wax
What is the easiest way to remove dried candle wax?
Let the wax harden completely, or use a sealed ice pack to make it brittle, then gently lift it with a plastic card or blunt scraper. Any thin residue can often be removed afterward with carefully controlled heat or a surface-safe cleaner.
Should you use hot or cold water to remove candle wax?
Water alone is usually not the best first step because it does not dissolve candle wax effectively. Harden and remove the bulk wax first, then use warm water and an appropriate cleaner only when the surface can safely tolerate moisture.
How do you remove candle wax from carpet?
Harden the wax with a cold pack, break away as much solid wax as possible, and vacuum the loose pieces. Remaining residue can often be transferred to absorbent paper or cloth using carefully controlled low heat that is safe for the carpet fibers.
How do you remove colored candle wax stains?
Remove all solid wax first, then treat the remaining dye or oily mark as a separate stain using a cleaner appropriate for the material. Avoid excessive heat because it may cause candle dye to spread or become more difficult to remove.
Can candle wax permanently damage a surface?
It can, particularly when hot wax penetrates porous materials, candle dye stains fabric or stone, or incorrect removal methods damage paint and finishes. Prompt but careful treatment gives you the best chance of removing wax without leaving a permanent mark.